posted on May 18, 2021
cPanel is a Linux-based hosting management control panel. It is used to manage your website and server’s backend working system. It provides graphical user interface for most of the tasks we perform on the website’s server, for example, uploading files, creating emails, setting cron jobs, handling databases, etc.
cPanel Users
cPanel is installed on a Linux system by the server administrator. With the help of the cPanel Software Server, an Administrator can create Virtual Private Servers or it can dedicate the whole server for shared hosting environment. cPanel Shared hosting has three types of user levels.
Server Administrator − This user is the root user of a cPanel Linux Server and has all the permission over the server. Server Admin can create, modify or delete any account from the cPanel Server. The Server Admin has access to cPanel WHM (Web Host Manger), which can be understood as the backend of cPanel.
Reseller Accounts − This user is created by the server administrator and server administrator can choose which type of permissions should be given to reseller accounts. A Reseller account can further create user accounts and has access to all those accounts, which they have created. One reseller account does not have access to the user accounts that were created by another reseller accounts. They also have access to WHM with limited permissions.
User Account − These are normal user accounts, each user who subscribes for a web hosting from a company, is given this type of account. They do not have access to Web Host Manager. User account can host single or multiple websites according to their plans they have purchased from web hosting provider.
Why cPanel
cPanel is packed with many features that is not provided by other web hosting management panels. It is graphical, hence, non–technical users can also use it perfectly. cPanel is responsive to the screen size, hence can be used in mobile and tablets. It will automatically adapt the screen size of the device.
cPanel is very easy to use and configure. It automatically adjusts all the advanced setting for web hosting. A user hardly needs to go to the command line to configure any settings, as it already has all the features inbuilt.
Advantages
cPanel offers the following advantages −
-
It is very easy to host a website using cPanel.
-
It is multiannual and available in many languages.
-
It is responsive and adapts to any screen size, it can be used efficiently in mobile and Tablet too.
-
cPanel has in–built File Manager, which helps in managing your files without the hassles of an FTP.
-
cPanel has integrated webmail software, which helps in sending and receiving emails through online webmail client.
-
You can easily create a backup of your website in a few steps. This will help you to restore your backup, if your website encounters any error.
-
You can easily manage your website databases, as cPanel has integrated phpMyAdmin, which helps to directly manage databases.
Disadvantages
cPanel does not have any significant drawbacks, however here are a couple of its notable disadvantages −
cPanel - Registering a Domain Name
If you have a website developed locally or you have planned to make a website, then there are two things that you will need — a Domain Name and Web Hosting. A Domain name is the address of your website, which will be used by your users to access it. For example, tutorialspoint.com or google.com these are domain names.
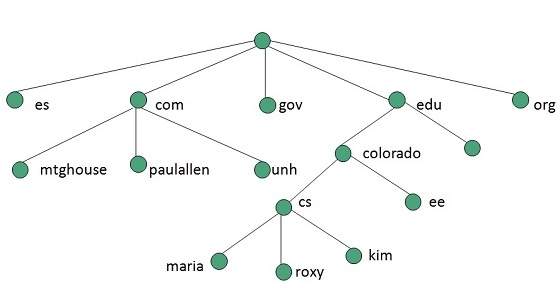
A domain name has two parts, TLD (Top Level Domain) and SLD (Second level domain), for example in tutorialspoint.com, tutorialspoint is second level domain of TLD .com, or you can say it’s a subdomain of .com TLD. There are many top level domains available, like .com, .net, etc. and also country specified TLD like .in, .uk, .ae, etc.
Importance of a domain
Getting a domain name of your choice can be very useful. You can use it for many reasons, for instance, you can create the identity of your brand online or you can create a personal blogging website. If you have a business, people will be able to learn about your business remotely.
Registering a Domain Name
Domain names are registered with a non–profit organization ICANN. It does not let you register your domain directly, but you will have to go with a domain registrar for this purpose. Domain name registrations involve a registration fee for a year, and you have to renew the domain every year by providing a renewal fee. Domain names cannot be purchased permanently at once, but you have to renew it every year, if you fail to renew the domain, it is automatically deleted from registry.
If you want to register your domain name, then you will have to follow these steps −
Step 1 − Choose a perfect domain name for your website. If it’s a business website, then you may want to go with a domain name, which is the name of your business.
Step 2 − Choose a good domain registrar company having good support infrastructure. For example, GoDaddy or BigRock.
Step 3 − In the registrar’s website, check if your domain name is available for registration. If the domain you selected has been already registered by someone, then you will have to think of some other domain name. If your domain name is available to register, then you can proceed further.
Step 4 − Provide your contact information and everything that the registrar asked for. It is mandatory that you provide correct information while registering a domain name, as it will be visible to everyone if the user looks for WHOIS information.
Step 5 − You can hide your contact details by choosing to be viewed by anyone by subscribing privacy protection service. This service hides all your contact information to everyone except the registrar, this service is provided by many domain registrars at some extra cost.
Step 6 − Complete the purchase by paying the registration fees. Domain name will be registered to you.
cPanel - Getting Web Hosting
If you have already registered your domain name, the next step is to get a web hosting for your website. Web hosting is a service, which provides space for your website on internet. If you want your website to publish online, then you will have to get web hosting service.
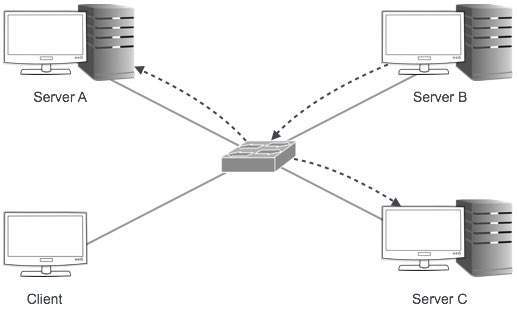
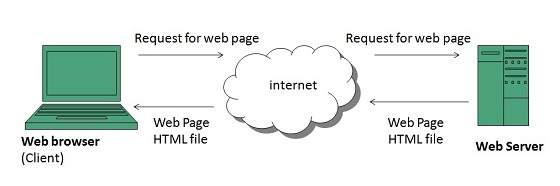
In a web hosting service, your website is stored in high powered computers called web servers, which are connected to a high speed network and they are powered-on 24/7. While purchasing a web hosting service, you rent a space for your website on these servers.
There are basically three types of web hosting −
Shared Hosting − In this type of web hosting, a single server hosts multiple websites, sometimes thousands of them. Each account on this server has certain limits on using disk space to store websites, databases and bandwidth. This is the amount of data transferred through your website. This type of hosting is cheap and suitable for small and medium websites.
Virtual Private Servers − In this type of hosting, a Linux Server is divided into several parts and each part acts as a different server, each server has some limited resources given. In this, the VPS administrator has root access to his VPS and can then host single or many websites according to his need. These type of hosting is recommended for medium and large websites. Cost of VPS is higher than Shared Hosting, but lower then Dedicated Hosting.
Dedicated Server − In this type of hosting, a whole server is rented to the user, who can host a large website on this server or can use it to host multiple websites in this server, the server admin can create multiple VPS. Cost of dedicated hosting is much higher and it requires a server admin to manage this type of hosting.
If your website is new and it is not expecting much resource usage, then you can go for shared hosting. You can purchase shared hosting for hosting one website or multiple websites according to your need. In this tutorial, we will learn about hosting a website using cPanel, hence it is recommended that you purchase the hosting that comes with cPanel.
cPanel - Setting Up Nameserver
When you have purchased your hosting, you will have to connect your domain with the hosting that you have purchased. If you have purchased the domain and hosting from the same provider, then it is liable that your Nameservers are already setup. If you have purchased your domain and hosting from different providers, then you will have to manually add new Nameservers to your domain, so that it can point your domain to the right server.
Nameservers are a part of Domain Name System. These DNS servers keep the records of which domain is connected to which IP address. Nameservers allow us to use a domain instead of IP address of the DNS server. When a visitor types the URL of your domain then the DNS server tells the browser that from which server it should load content from. In easy words, Nameservers define the current DNS provider of your domain.
When you get the email of the Login details of your web hosting server along with it, you also get the details of your Nameservers. Most hosting providers use their own DNS servers. For setting up your Nameservers, you will have to login to your domain control panel, and update your Nameservers by replacing the old one. Each domain provider has its own application to do so, you will have to refer to your domain registrar’s documentation for further details.
Domain Nameservers take time to propagate through different DNS servers around the globe, the change may reflect instantly or it may take up to 48 hours of time according to the DNS servers of hosting provider.
cPanel - Logging into cPanel Dashboard
In this chapter, we will learn to login into the cPanel Dashboard. For logging into the dashboard, you will need your login credentials. This information is sent to you, when you have signed up for cPanel hosting or you may have created during purchase of hosting.
cPanel Dashboard is accessible by two ports – 2082 for unsecured connections and 2083 for secured connection, many hosting providers support unsecured connections, but it is always recommended that you should use a secured connection only.
There are many ways to find the login screen of a cPanel. Recommended is that you may use the IP address of your cPanel, you may find the cPanel using IP address by typing the following in address bar −
https://:2083
https:///cpanel
If you have already updated your Nameservers for your domain, then you may use your domain for directly accessing cPanel by your domain. You may find cPanel login screen using your domain by typing the following into the address bar −
https://:2083
https:///cpanel
Once you are redirected to your login screen, you will find the login screen like shown below.
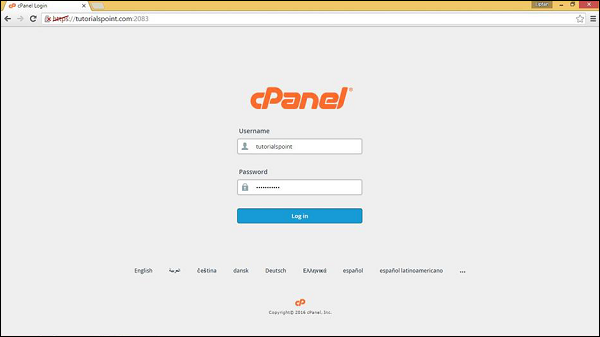
You can enter the Username and Password and press the Log in button to login into the cPanel Dashboard.
cPanel - Changing Password
When you are successfully logged into a cPanel Dashboard, first and foremost, change the password of your cPanel account. This is very important, so that the security of cPanel remains intact. Nobody would want their website to be hacked.
To change your cPanel Password, follow these steps −
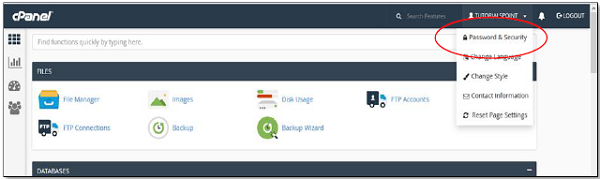
Step 1 − In cPanel Home, click username written over the right corner of the dashboard.

Step 2 − Click Password & Security option. You will find Change Password Interface.
Step 3 − Write your old password and in the following fields, write your new password twice.

Step 4 − Enable digest authentication option if you need to access your webdisk via an unencrypted connection in windows machine. This type of connection is unsecured and not recommended.
Step 5 − Click Change your password now! Button to change your current password. If successful, then cPanel will automatically log you out and you will have to login again with your new password.
cPanel - Styles
You can change cPanel’s look and feel using this interface. cPanel has two major interface styles in which you can manage your web hosting. Although these interface is very standard, but these can be modified by your server administrator or reseller account admin to change its logo and icons etc.
To modify your cPanel Style follow these steps −
Step 1 − In cPanel Home click username written over the right corner of your dashboard.
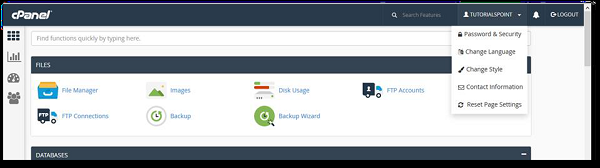
Step 2 − Click Change Style option. You will find Change Style Interface.


Step 3 − Choose any style option from the available styles, click Apply button which can be found over the top of the style to load the new style.

Step 4 − cPanel will automatically reload to apply the new setting and you will find a new interface according to the one you selected.
cPanel - Contact Information
In this interface of cPanel, you are allowed to change the system email address. It is the email address on which the system can notify you for important updates. You cannot use your system email address or any email address, which is connected with your domain, so that you do not lose any important update, when the system is down.
To update your contact email, follow these steps −
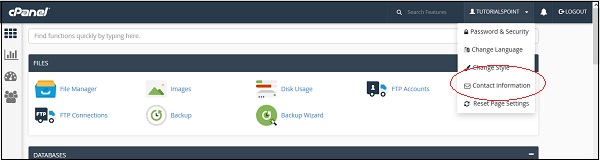
Step 1 − In cPanel Home, click username on the right corner of your dashboard.

Step 2 − Click on Contact Information option. You will find Contact Information Interface.
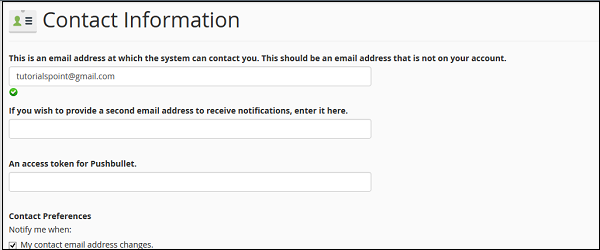
Step 3 − Enter the email address on which you want the system to contact you for important notifications.
Step 4 − You can enter a second email address on which you can receive the copy of that email sent on your primary email.
Step 5 − You can choose the options of an event on which the system should send you notification in contact preference. It is recommended that you leave every checkbox selected.
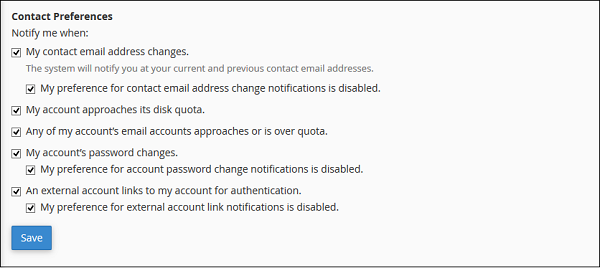
Step 6 − Click the Save button to save your contact preference.
cPanel - Home
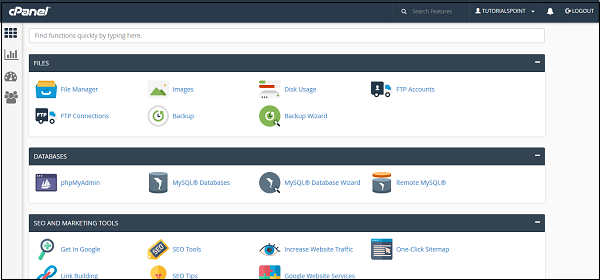
Once you are logged into cPanel dashboard, you will see that it has so many options. In this chapter, you will find a quick brief of every option shown in the cPanel dashboard.
Sidebar
You can switch to your accounts’ four main areas of cPanel through this interface, which are −
-
Home − This is where you can access all the features of cPanel.
-
Statistics − Displays information about your cPanel account and also the resources it used.
-
Dashboard − Displays quick links to change styles etc. and overview of your cPanel account.
-
User manager − Here you can manage the users of your cPanel account.
Navigation Bar
On this toolbar, you will find the cPanel’s logo and a search box in which you can type any function of cPanel to access it quickly. Like your User account name and some quick links, once you click on it. The Notification Icon will show you the recent notifications about your cPanel account. Logout button will end your session (log you out) from the cPanel.
Feature List
It displays all the features and functions you have in your cPanel. You can click on any function and it will take you over to the desired functions interface.
cPanel - Statistics & Dashboard
In this chapter, we will discuss about the cPanel statistics and the dashboard along with a few examples and screenshots for better understanding.
cPanel Statistics
The statistics interface of cPanel shows quick statistics of your cPanel account. It includes several types of information shown below. To view quick statistics of your cPanel account, click on second icon statistics from sidebar at left. You will find this information in cPanel quick statistics.
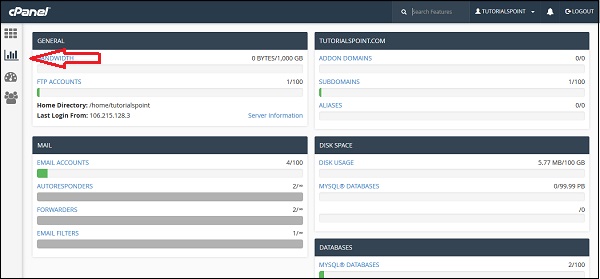
General − It will show you the amount of bandwidth allotted to your account and also the amount of bandwidth, which is used by you. It will also show you the FTP accounts available in your cPanel account. It will also show the information of your Home directory and the IP address, from which you logged in last time. You can click on the Server Information to view the detailed information of your server.
Domain Info − In the next box, it will show you the information of main domain and the number of add-on domains, subdomains and aliases you have created.
Mail Info − This section will show the information about your emails. It will tell you how many email accounts, Autoresponder Forwarders and Filters you have created along with the total number of resource allotted.
Disk Space − In this section, the total disk space of your account is shown and also the amount of space used by MySQL database is shown along with total amount of space allotted to your account and MySQL database.
Database − This section shows the info of total number of databases you have created along with the total number of database you can create.
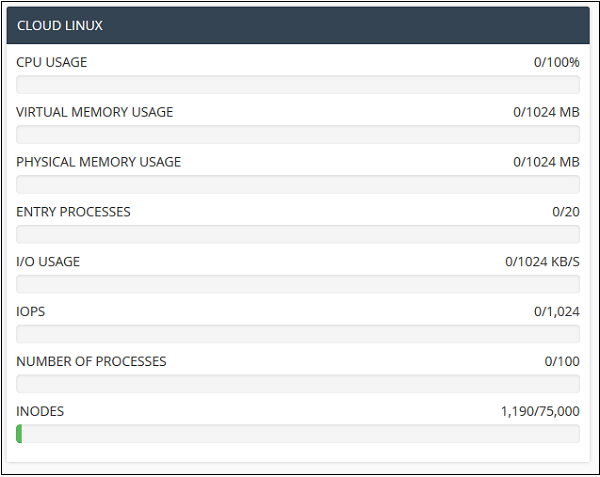
System Information − In this section, the statistics cPanel shows you the information of your system with total CPU usage, virtual and physical memory that is being used. It also displays information of the process you are running, the Input and Output uses and also it displays number of inodes, which means the number of files.
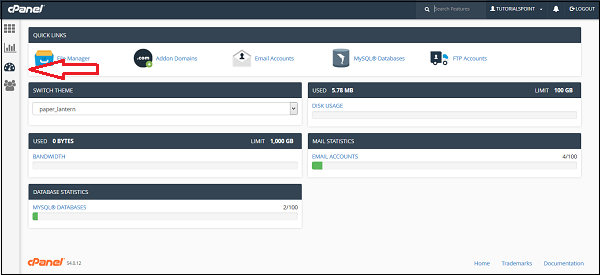
cPanel Dashboard
Through this interface you can see some brief statistics of your cPanel account plus you can change the theme of your cPanel account. To access your dashboard, you can click on the third icon ‘Dashboard’ on the left sidebar.
cPanel - User Manager
This is a new feature introduced in the latest edition of cPanel. Through this user manager section, you can control all the users you have in your cPanel with a single interface. This interface will show you all the user accounts, who have email accounts or FTP accounts that are associated with your domain. You can delete edit those accounts, change passwords and also you can delete them from here. This interface gives you the ability to add new user and associate them to FTP and Email account too.
To Delete an Account
To use user manager and delete user accounts, you can follow these steps −
Step 1 − Open User manager by clicking the last icon in the sidebar on the left side. Once user manager is open, you will see an interface like this −
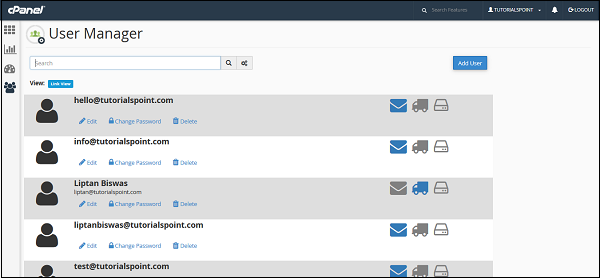
Step 2 − You can view all the accounts of your cPanel here, which includes your system accounts too. Account having the Inbox icon colored shows that the account has an email address. The accounts having the truck icon colored show that the account has an access to FTP account, whereas the accounts having the disk icon colored shows that the account has access to a webdisk.
Step 3 − Find the account you wish to delete and click on the delete link under the domain.

Step 4 − You will be asked for confirmation, click on the delete button to delete the user account.
To Edit an Account
If you wish to edit an account or to change the password of any account. Follow these steps −
Step 1 − Choose the account you wish to edit or change password of, from the user manager. Click on Edit link or Change Password link under that account. Both of these will take you to the same interface, where you can edit the account.
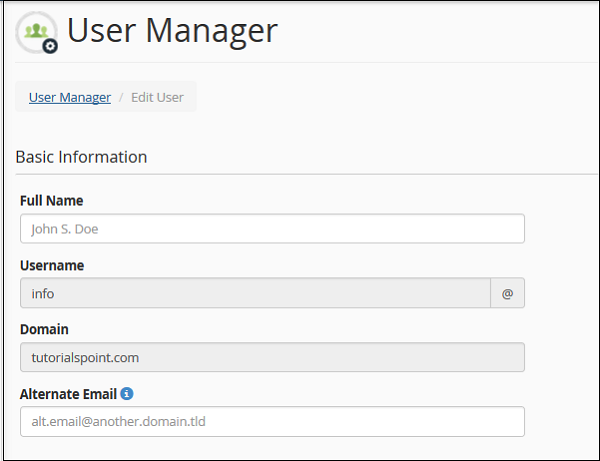
Step 2 − You can specify the Full name of the user. Or else, you can provide alternate email id for that account.
Step 3 − Scroll down to see the Security Information, you can provide a new password in this interface or whether, you wish to change the password, if not leave it blank.
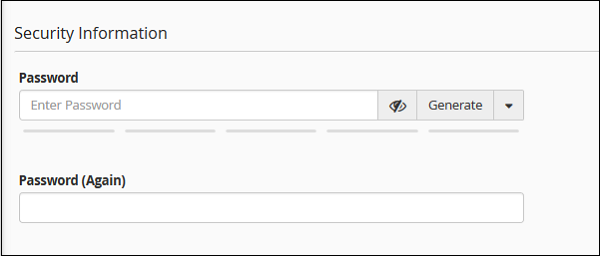
Step 4 − Choose the services you want to enable for that user account from the services interface.
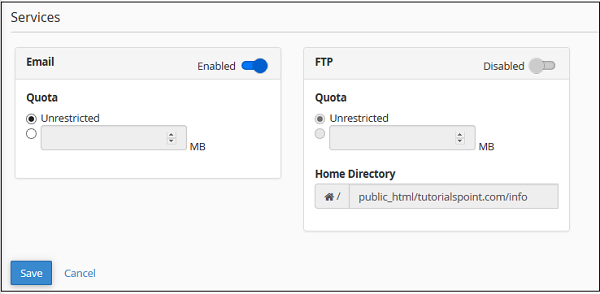
You can enable or disable email, also you can change the Quota for the email of that account. You can also enable FTP for that account, just move the switch to enable the FTP account.
Step 5 − Click Save for saving the settings for that existing user.
Add a New User
You can also add a new user and give him access to email and FTP. To create a new user, follow these steps −
Step 1 − Click ‘Add User’ Button found on the right side of the user manager interface. And you will see the same screen, which you saw on the Edit user interface.
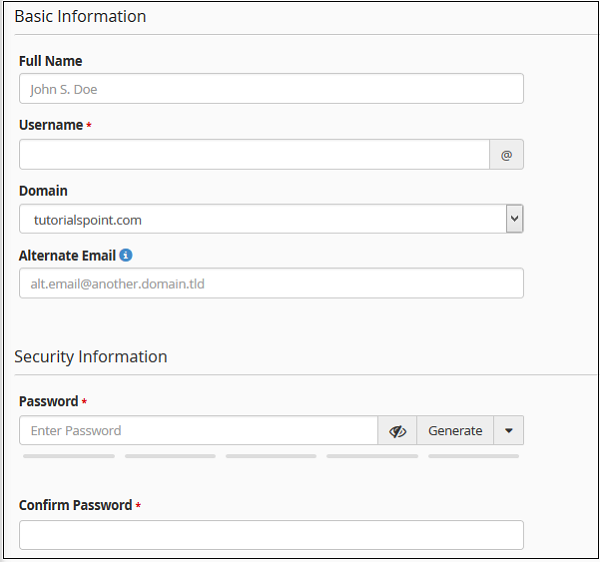
Step 2 − Provide all necessary information like username and password, you can also provide full name of the user, but it is optional.
Step 3 − Choose services you want to give to that particular user. Enable the services by moving the switch to enable or disable the services.
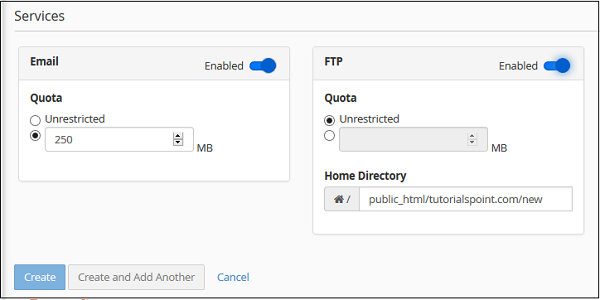
Step 4 − Click the Create button to create the user and return to the user manager interface or click Create and Add Another to create the user and return to Add user interface to add a new user again.
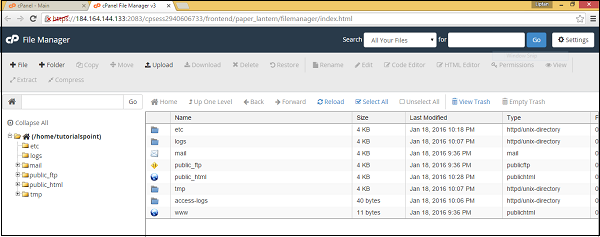
cPanel - File Manager
cPanel File Manager gives you useful options to quickly manage your files within the cPanel interface. It’s easy to use and it removes the hassles of using FTP. You can create, upload, modify or remove files from this interface. It also gives the feature of moving files to Trash before permanently deleting them, from which it can be recovered later.
To open the file manager, click on File Manager in the Files section.

It will open a new tab and once you are in File Manager, you will see a Dashboard like this.
cPanel File Manager gives you a lot of flexibility for Navigating within your files.
You can use file manager for following tasks.
Searching for a File
To search for a file, use the search bar on top of the File Manager Dashboard. You can search within all your files, public_html or current directory, then write the file name in next input box and click go to search for a file.
Note − public_html is folder in cPanel, all the files which are accessible from the frontend of your website are stored in this directory. Index.html or index.php found in this folder loads first, when somebody accesses your website from frontend by your URL.
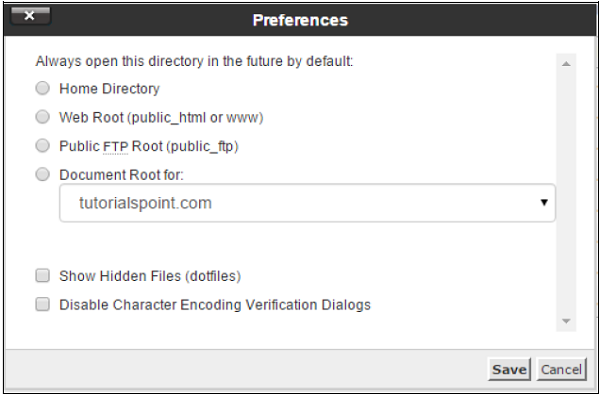
File Manager Settings
To access cPanel File Manager Preferences, click setting buttons from the top of the Dashboard. You will see a Prompt as shown below.
-
By default, cPanel File manager opens the Home Directory of your account, when opening the cPanel. But, we can override this by choosing it with Web Root, which is public_html folder of Public FTP root or with a Document root of your domain or any subdomain you create.
-
In Linux, hidden files have a single Dot (.) in front of them. The default cPanel File Manager does not display them, but you can choose to show hidden files by enabling Show Hidden Files (dotfiles) option.
-
When we open a text file, which may be HTML, PHP or Plain Text file, cPanel opens a dialog to check the character encoding of the file, to ensure maximum compatibility, when editing the file. You can disable this feature by selecting – Disable Character Encoding Verification Dialogs.
Working with File Manager
Creating a File
To create a new File, navigate to the directory, where the file needs to be created and then click New File from the Dashboard. A prompt opens and asks you the file name. Enter it accordingly with the extension of file and Path, where the file will be created. Finally, click Create New File and a new file will be created.
Creating a Folder
To create a new Folder or Directory, navigate to the directory in which you want to create the folder. Click on New Folder from the Dashboard. A Prompt will be opened to ask you name of your New Folder. Enter your desired Folder name and Click Create New Folder. Your new folder will be created.
Copying
You can copy a single file or folder or even multiple files or folders. To copy a single file or folder select what you want to copy with a single mouse click over the it and Click Copy. You will be asked the file path where you wish to copy the file or folder to, enter the Path accordingly and click Copy File(s).
To copy multiple files or folders, single click on the desired files or folders by holding down the ctrl key to select multiple files or folder and then click on copy. Enter the desired location and Click to Copy File(s) button to copy multiple files.
Moving
You can move a single file or folder or multiple ones. To move a single file or folder, select the one that you want to move with a single mouse click over it and Click on Move. You will be asked the file path where you wish to move the file or folder to, enter the Path accordingly and click on Move File(s).
To move multiple files or folders, single click on the desired files or folders by holding down the ctrl key to select multiple files or folder and then click on move. Enter the desired location and Click to Move File(s) button to move multiple files.
Uploading a File
To upload a file from the cPanel File Manager Interface, navigate to the directory in which you wish to upload and then, click Upload. You will find the interface shown below.
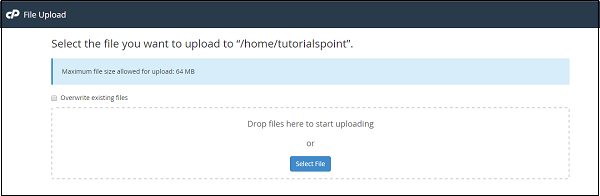
You can Drag and Drop the file to upload or you can select the file from Select File button. If you want the File Manager to automatically overwrite the files with same name, you can select – Overwrite existing files checkbox.
Downloading a File
To download a file from the cPanel File Manager, you can select the single file or multiple files with single click on file name, and click over Download to download the files.
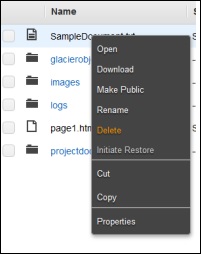
Deleting a File or Folder
To delete Single or Multiple file or folder just select the files with single mouse click and click on Delete button. You will get a prompt for sending the files into Trash, if you want to permanently delete the files then select Skip the Trash checkbox. If the check box is not selected, files are moved to Trash Folder from where you can recover them later.
Renaming a File or Folder
To rename a File or Folder, select the file or folder with a single mouse click and Click on rename. You will get a prompt to enter new file or folder name. Enter file or folder name accordingly and click on Rename File button to save. You can also double click on Name of any File or Folder to rename the file.
Text Editor
To edit any text file with simple text editor, select the file and click on Edit button. You will get a prompt with Encoding check if enabled, then click on Edit in prompt to edit the file. Text editor will open in a new tab, where you can edit the file. You can also switch to Code editor from here. When you have finished editing, click Save to save the File.
Code Editor
Code editor makes it easy to edit those files, which contains code in them. It differentiates color between codes, which makes it easy to edit those files.
Extracting a File
To extract a File which are compressed, select the file you wish to extract and click on Extract Button. You will get a prompt to enter the path where you wish to extract the files, if you enter a path which is not existing, cPanel File Manager will create the directory and extract the file in it.
Note − cPanel File Manager can only extract files which are in Zip, GZip and BZip2 type of compression.
Compressing a File or Folder
To compress a folder or a single or multiple files, select the files and click on Compress. You will get a prompt, select the compression method where you can choose from Zip, Gzip or Bzip2. It will ask you to enter the file name, enter file name accordingly and click Compress File(s). After compression, the result will be shown to you.
Viewing a File
This option helps you to view the content of known file types within cPanel Interface. Select the file you wish to view and click on View. It will open a new tab and the content of file will be shown to you.
cPanel - File Permissions
All files and directories in Linux Operating System has access permissions. This feature gives the ability to the user for setting up different access levels for each user and also Operating system gets the ability to deal with different request for accessing the file. This feature makes system more secure to potential security threats. There are three types of access permissions −
-
Read − It is denoted by ‘r’ and number 4, it gives ability to the user for reading the file only.
-
Write − It is denoted by ‘w’ and number 2, it gives ability to the user for writing into the file only.
-
Execute − It is denoted by ‘x’ and number 1, it gives ability to user for executing the file only.
Access permissions can be given in groups too, for example, if we want to give a file to read and write permission only, we can assign ‘rw–‘ to that file or in numerical form, we can assign number 6 – as 4 for read and 2 for write equals to 6.
These access permissions are given to three types of users −
-
User − It is owner of the file.
-
Group − It is the group of users in which Owner lies.
-
World − It is referred to everyone else.
We give access permissions according to file types in cPanel. By default, cPanel File Manager gives 6-4-4 permissions to the users – 6 to the User, 4 to the Group and 4 to the World. Most of the time we do not need to change the file permissions unless needed.
You can change the file permissions in cPanel environment by using the following steps −
Step 1 − Go to File Manager from cPanel Home.
Step 2 − Navigate to the File or Folder you wish to change permissions to and select the file or folder by a single click of the mouse.
Step 3 − Click on Permissions link from the Top menu of File Manager and you will get a Prompt as shown below.
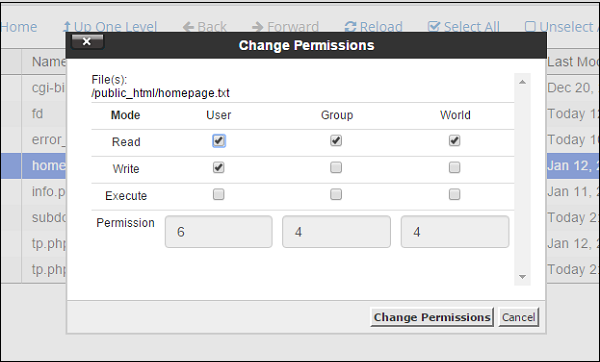
Step 4 − Choose permissions according to your need and Click on Change Permissions to save the new access permissions of the file.
cPanel - Images
With this feature of cPanel, you can manage and modify your Images directly through its Interface. The image must be uploaded into your account to use this feature. To access cPanel Images, click Images Link found on your files section.

This feature includes the following tools −

Thumbnailer Converter
Thumbnailer creates small images or Thumbnails of the original image. This is done by using these images wherever required as it could save more bandwidth. For example, when we need to display a preview of the photo, which will then be opened into a new tab, when the user clicks preview image. We can use a small image here, rather than forcefully scaling the image to display in a small size.
To use Thumbnailer converter, we can open the application by clicking on the Thumbnailer link from images section. We will get a similar dashboard as shown below.
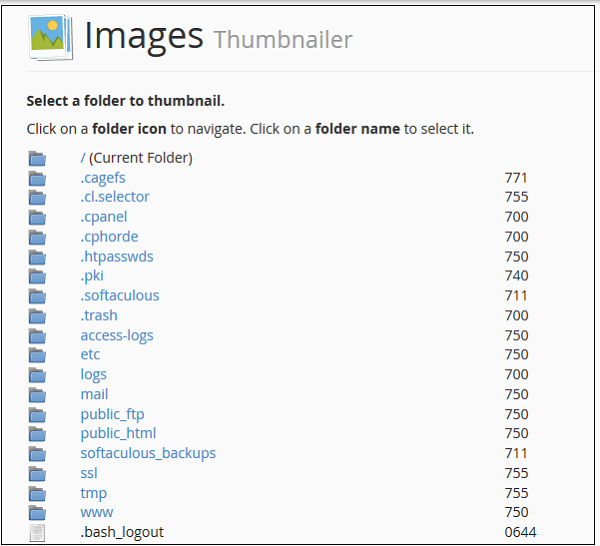
Step 1 − Navigate to the desired directory from which you wish to create Thumbnails, to navigate within directories use folder icon on left hand side.
Step 2 − Select folder from which you wish to create thumbnails, by clicking on the name of folder displayed in middle.
Note − Thumbnailer is a bulk thumbnails creator tool, single image cannot be used in these tools.
Step 3 − In Scale Percent, text inputs enter the percentage by which you wish to shrink the image. Select Keep aspect ratio to maintain original proportion of the Image.
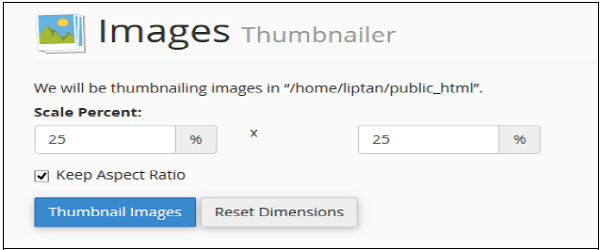
Step 4 − Finally click on Thumbnail Images to create thumbnails.
The system will automatically create a subfolder, Thumbnails into selected folder and all files in that folder will be converted and saved there with a prefix tn_. For example, if you have an image abc.png, then it will be saved into tn_abc.png.
cPanel - Image Scaler
Image Scaler is a very useful tool to scale an Image to increase or decrease its dimensions, or we can say to resize an Image. To scale an image, we need to follow these steps −
Step 1 − Open Image Scaler by clicking Scaler from Images section.
Step 2 − Navigate to the directories by clicking on folder icon on the left hand side, same way as done above.
Step 3 − Select the File which you want to resize by clicking on the Name of File.
Note − Image Scaler is a single image tool, and can be used with a single image at a Time.
Step 4 − Enter either new dimensions in Pixels or Enter Percentage by which you want to increase or decrease the Image. You can select, Keep Aspect Ratio, so that the Image ratio is not disturbed, and also you can retain the old copy of the file as Image Scalar replaces old Image to the new one.
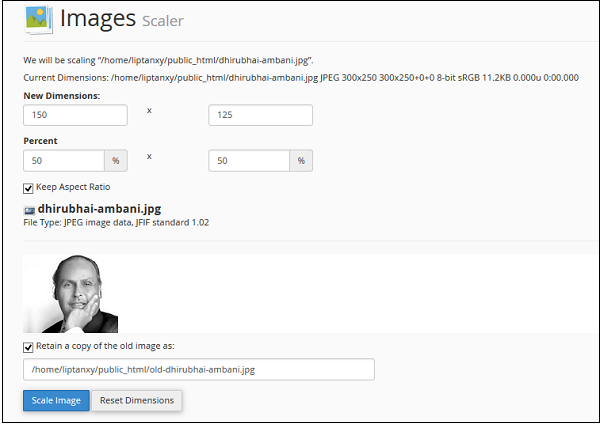
Step 5 − Finally Click Scale Image.
cPanel - Image Converter
Image converter can be used for converting image format of any image. It can convert from one supported type to any other supported type. To use Image converter, open the interface by clicking Converter link from Images section.
Step 1 − Navigate to the directories by clicking on folder icon on the left hand side, as we did above.
Step 2 − Select the File or Folder which you want to resize by clicking on the Name of File or Folder.
Note − Image Converter can be used with a single file or folder.
Step 3 − Select new file type from the prompt as shown below, which can be −
- Portable Network Graphics (.PNG)
- JPEG (.JPG)
- GIF (.GIF)
- Bitmap (.BMP)
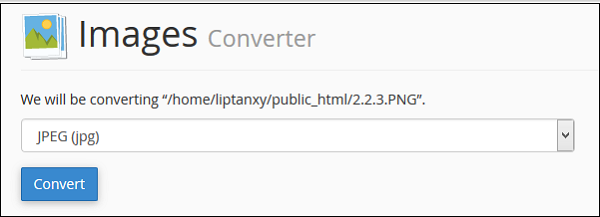
Step 4 − Finally Click on Convert to convert the file type.
cPanel - Directory Privacy
This feature of cPanel allows us to protect certain directories with a username and password. If a directory is protected by this, then if somebody from the front end of your website tries to access the file, they will be prompted to provide a username and password, if username of password does not match, then the user will not be able to see the content of that directory.
To configure a password for a directory, use the following steps −
Step 1 − Open Directory Privacy Configuration by clicking Directory Privacy in the Files Section.

Step 2 − Navigate within your directories to find the directory you want to protect. Use icon on the left hand side to open a directory.
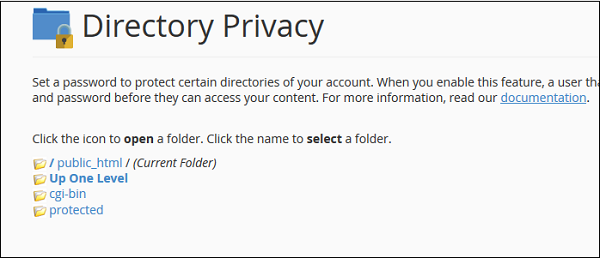
Step 3 − Select the directory you want to protect by clicking on the name of the folder, you will get same configuration as shown below.

Step 4 − Select Password protect for this directory checkbox and enter a Label which you wish to display in the frontend, click Save to protect this directory.
Step 5 − To give access to users, you will need to create users. Enter username and password to create a new user, who will have access to this directory from the frontend.
Step 6 − Click Save to give access to this user. You can also create more than one user here.
If you now try to access your password protected directory, you will get a prompt like this −

You can now enter the username and password to access this directory.
cPanel - Disk Usage
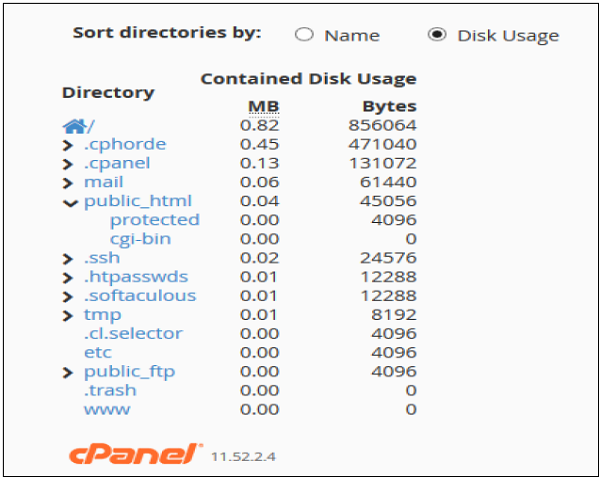
cPanel Disk Usage is a very efficient way to monitor your accounts available and use disk spaces. This feature scans your disk to provide you a graphical overview of the Disk usage. It displays disk space used by directories, but it does not show how much space is consumed by an individual file. It also displays information of disk quota used by MySQL Databases, hidden directories and Emails.
It helps in management of disk quota, because once you know which directory has the largest files, you can navigate to that directory using file manager and delete unnecessary files.
To access this feature, click Disk Usage link from Files section of cPanel.

cPanel Disk Manger has mainly two tables. The first table gives you information about disk space used by subdirectories of home directory and space used by other features like MySQL, Mailing Lists. Please refer to screenshot below.

The Second Table displays a directory structure, which has all the subdirectories including hidden ones, to open a directory to view space used by that sub-directory, you can click on the arrow shown in front of the name of the directory. Clicking on the name of directory will take you to the File Manager. In this table, you can see which subdirectory has the largest files in them, it is very helpful when there are lots of directories in your account.
cPanel - FTP
File Transfer Protocol (FTP) allows you to manage your files with third party applications like FileZilla, CoreFTP, etc. Using a FTP file manager to upload files is a great practice when the number of files or size of the files is large. FTP accounts configures users who can upload, download or modify your files through FTP. Each FTP user has his own username and home directory, only that certain directory the user will have access to.
To create an FTP account, please follow these steps −
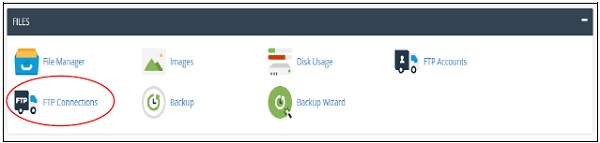
Step 1 − Open FTP accounts feature by clicking FTP accounts found under Files Section.
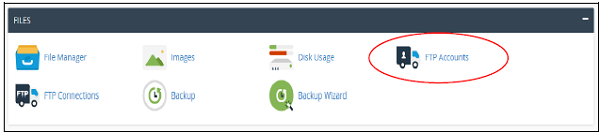
Once FTP accounts feature is opened, you will see the following screen.
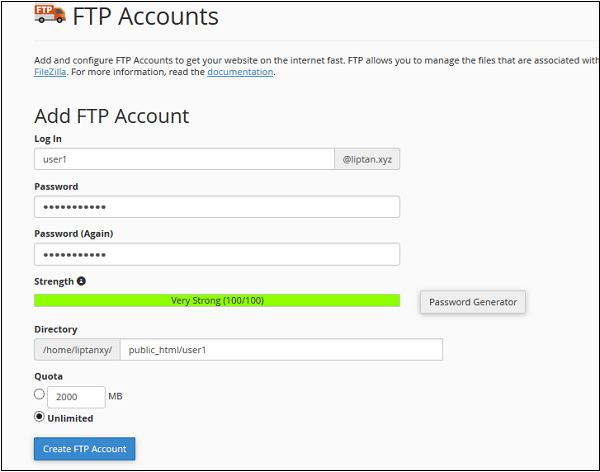
Step 2 − Enter Log in name for your new user, it will be the user’s username, also provide a strong password for this user.
Step 3 − Enter Directory for your new user, you may also leave it with pre-filled directory name according to your user.
Step 4 − Provide FTP storage quota, you may provide unlimited quota or use some value in Megabytes.
Step 5 − Click on Create FTP Account and Your FTP account will be created.
Configure FTP Client
To configure your FTP client, you can download any pre-built configuration file by clicking Configure FTP Account.
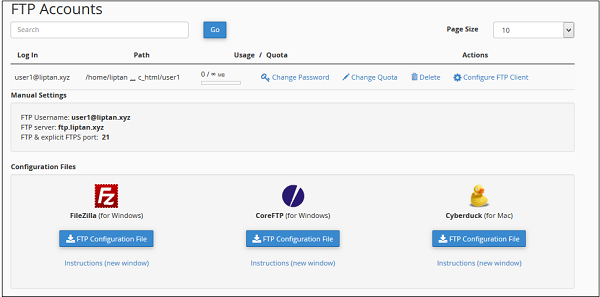
You can download FTP Configuration files for FileZilla or CoreFTP, which are windows software or Cyberduck for Mac.
Special FTP Accounts
These FTP accounts are pre-built with hosting account and cannot be deleted, these are used for administrative purposes.

One of the Special FTP account is your Administrative FTP account, whose username will be same as your accounts username. This FTP account’s home directory is your cPanel accounts root directory. You can access all the files of your account with this FTP account. Its password will be the same as your cPanel account password.
cPanel - FTP Sessions
The cPanel FTP Session interface shows current users, which are logged in to website through FTP. This interface is helpful and it helps you to terminate unwanted connections with one click.
To access this feature, click FTP Sessions link from the Files section of cPanel.
It will open an interface in which it will show the current users who are logged into your site. If no user has logged in, it will display the message that no users have logged in.

Here it will show the following information −
|
| Example |
| User |
Displays username of logged in user |
liptanxy |
| Logged in Form |
Displays IP address or hostname of user’s system |
106.215.178.204 |
| Login Time |
Displays Login Time of User |
Thu Jan 21 13:50:03 2016 |
| Status |
Displays Sessions status |
IDLE |
| Process ID |
System’s FTP Session Process ID |
203299 |
| Actions |
Terminate the connection |
Disconnect |
Terminate a FTP Connection
If you think that any user is not doing any activity and is in IDLE mode for a long time, or if you think a user is uploading a very large file, or doing something malicious, you can terminate the connection by clicking the disconnect button from Actions. You will see the following prompt.
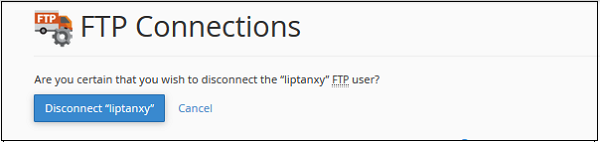
Click on Disconnect “User”, and user’s FTP connection will be terminated instantly.
cPanel - Backup
This feature of cPanel is very useful for your website. We can use backup feature for transferring our website to the new host. If we are making a change in the website files or database, we can create a backup of website. So that, if in future anything wrongs happens to the website while editing, we can always restore to as it was before. If any problem occurs with the hosting provider, you will always have a copy of the website.
cPanel Backup creates a zipped copy of your entire website or a part of your website. There are two types of Backup in your cPanel Backups.
Full Backup
Full Backup creates a zipped copy of your entire website and cPanel account. It includes all the files you own or you have access to. It also includes all the databases, email accounts, email lists, subdomain, etc.
Full Backups cannot be restored through cPanel interface. It is only used when you are transferring your current host to the new host. You need to upload this zipped backup into your home directory and ask your hosting provider to restore it.
To download your full website backup, please follow these steps −
Step 1 − Open cPanel Backup by clicking Backup from the Files section in cPanel Home.

At the top, you will find Full Backup as shown below −

Step 2 − Click on the Big Blue button on which “Download a Full Website Backup” is written and you will be taken to this screen.

Step 3 − Select Backup destination, leave it as home directory. This will create a backup in your home directory, from where you can download it later. Enter the email address, where you want to receive a notification, when full backup of your website is ready to be downloaded. As full website backup takes time to generate.
Step 4 − Click Generate Backup and you will see a success message of Backup in Progress.
To download the Full Website Backup, you can always come back to this page after you receive your email notification and you will see a screen similar to the one shown below.
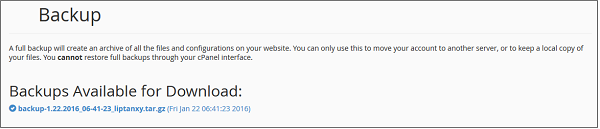
Download your backup by clicking over the backup link.
Partial Backups
Partial backup is created and can be downloaded instantly. Through Partial Backup, you can download your Home Directory, Databases, Email Forwarders and Email Filters separately. You can restore the downloaded backups any time by uploading them to cPanel using the same interface.
To use this feature, open your Backup section using the same method used above in Step 1, scroll down and you will see a similar interface shown here, interface will vary according to your domain and data.
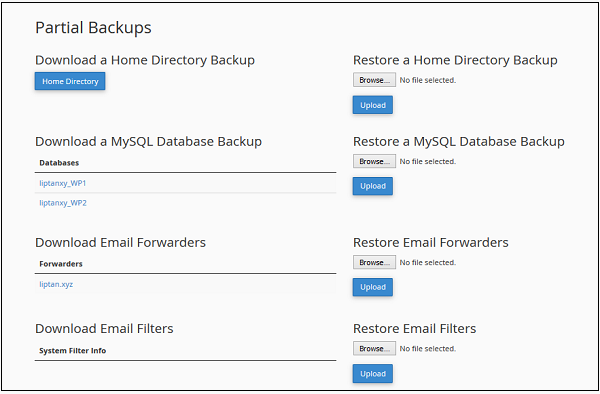
You can click Home Directory button to download your home directory backup. To restore your home directory, you can upload the same file in the right hand side interface on which Restore a Home Directory Backup is written.
You can do the same with Databases, Email Forwarders and Email Filters.
cPanel - Backup Wizard
You can use cPanel Backup Wizard to Backup and Restore your cPanel website step by step. cPanel Backup wizard is created for non–advanced users to simplify the backup and restore process.
To use cPanel Backup Wizard, open this interface by clicking the Backup Wizard link, which can be found under the Files section of the cPanel Home.

Once you are inside your Backup Wizard you can Create Backups or Restore Backups through the similar Interface shown below −

To use this Backup Wizard, there are 3 important steps −
If you need to download backup of your website
Step 1 − Select Backup.
Step 2 − Select Full or Partial backup, as stated in the previous chapter. We cannot restore Full Backup, same applies here too. If you wish to download Partial Backup, you can click on any one from the Home Directory, MySQL Databases or Email Forwards & Filters. Partial Backup downloaded from Backup Wizards can be restored through the Backup Wizard only.
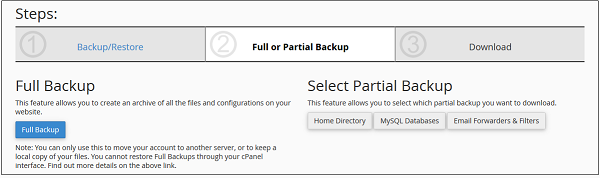
Step 3 − Download your backup according to your choice.
If you need to restore your website form the backup you downloaded, follow these steps −
Step 1 − Select Restore from Backup Wizard Interface.
Step 2 − Select Restore Type from Home Directory, MySQL Databases or Email Forwarders & Filters.
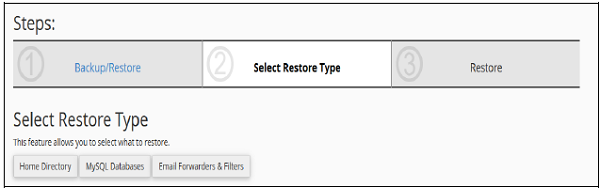
Step 3 − Upload your backup file to and click on Restore Button to restore your backup.

cPanel - MySQL Databases
MySQL is the most popular Open Source SQL Database management system. To manage a huge volume of data efficiently, we store the data in tables, a group of many tables can be created in a single database. This interface allows you to create and manage the existing MySQL databases.
If you are creating a PHP based application or any application that uses a database, then you will need to create a database and a database user to access this database. To use WordPress, Drupal, Joomla or any other CMS, you will need to create a MySQL database before installing these CMS.
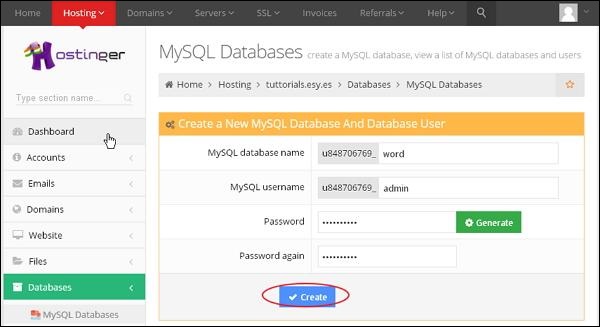
To create a new MySQL database, you need to open MySQL interface by clicking MySQL Databases link, which can be found in the Databases section of cPanel Home.

Create a New Database
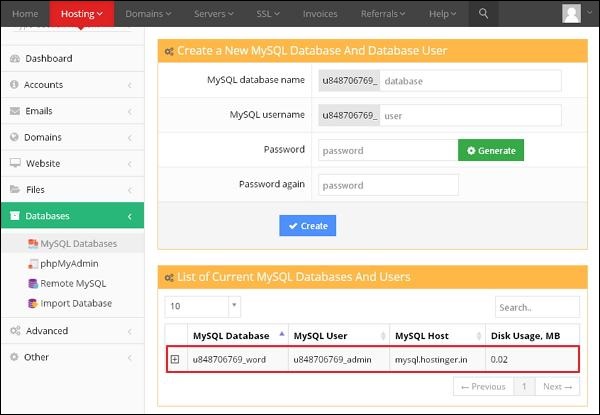
When MySQL Databases interface will open, first thing you will see is Create New Database Section as shown below.
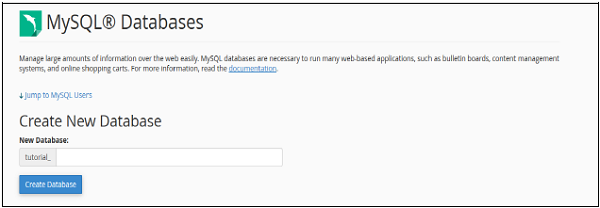
To create a database, simply enter the name of the database you wish to create and then click Create Database Button. You will now get a success message that the database is added.

Note − cPanel will automatically add a prefix to your database name you enter. So that there is no ambiguity in databases as in shared hosting environment. There are many users and there cannot be same name for two databases, thus your database name become Prefix_dbName. When connecting the database with web application you will need to use Full Name of database.
Add a Database User
To use your newly created database in your application, you will need to create a user and grant it all the privileges to modify the data in Database.
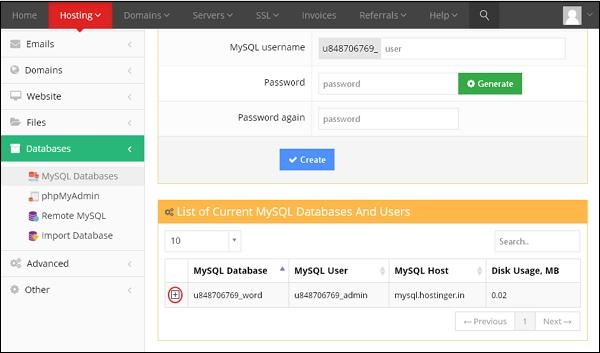
To create a Database User, scroll down to the end in Interface of MySQL databases. There you will see MySQL users, under it there will be Add New User, as shown below.
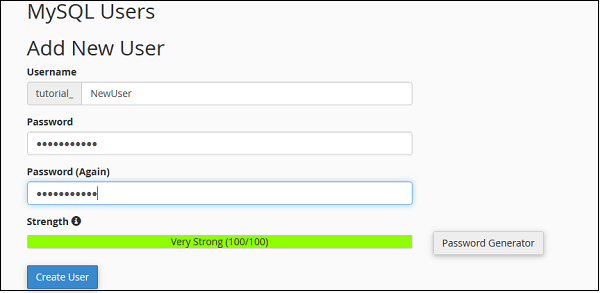
Step 1 − Enter a username according to your choice and choose a strong password. Click Create User to create a new user. You will get a success message “You have successfully created a MySQL user.
Note − Full username of your database user includes prefix and the username you provided.
As we have created a database user, now we will need to add the user to access the database.
Step 2 − Scroll down to find “Add User to Database”.
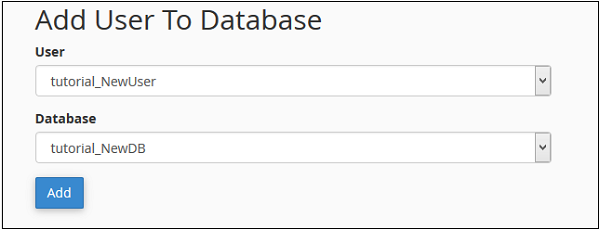
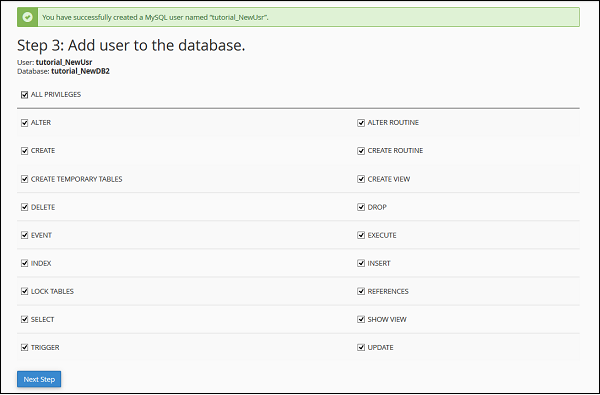
Step 3 − Select the User and database you wish to associate together. Click Add button and you will see the following screen.

To provide all the privileges to the user, select ALL PRIVILEGES checkbox and all the checkboxes will automatically get selected. Click Make Changes to save the changes.
Modifying a Database
The data stored in MySQL may get corrupted over time. There are many reasons for which this might happen. While using the Database in web application, if we see any database related error, we need to repair the database to repair the corrupt data. But before we repair our database, we will need to find the table on which our data is corrupted by checking the database for errors.
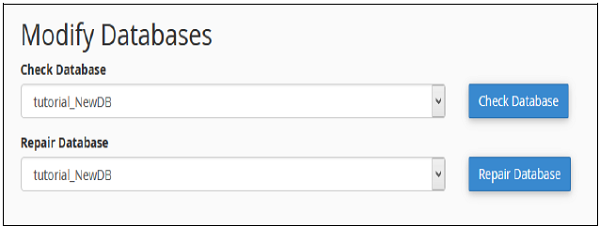
There are two operations we can perform to troubleshoot database related errors. To perform these actions, we need to scroll to Modify Database Options in MySQL Database Interface, screenshot for Modifying Database is shown below.
Check a Database
With this feature of cPanel Database, you can find which table in the Database is corrupted.
To check a database, we need to perform the following steps.
Step 1 − Select the database you want to check, from the dropdown menu of Check Database, as shown above.
Step 2 − Click the Check Database button.
Step 3 − cPanel will now run an automated script to find the corrupt table in the Database. If any corrupt table is found, it will display the name of the Table, otherwise it will display a success message.
Repair a Database
This database tool helps in automatically repairing of corrupt data or table from the database.
To use this tool, we need to perform the following steps −

Step 1 − Select the database having corrupt data from the dropdown menu.
Step 2 − Click Repair Database button.
Step 3 − cPanel will now run an automatic script to repair the corrupt data or table from the database, if it succeeds, it will give you a success message. If it fails to repair the database, it will show you an error with the table name on which the error occurred.
cPanel - MySQL Database Wizard
MySQL Database Wizard is a step by step process to create a MySQL database and user and finally adding the user to access the database.
To use this interface, we will need to open MySQL Database Wizard, which can be found in the database section of cPanel Home, as shown below.

Step 1 − Create a New Database by providing a Database Name in the text input, once filled, click Next Step.

Step 2 − Create Database user by providing a username and Password. Click Create User when done.
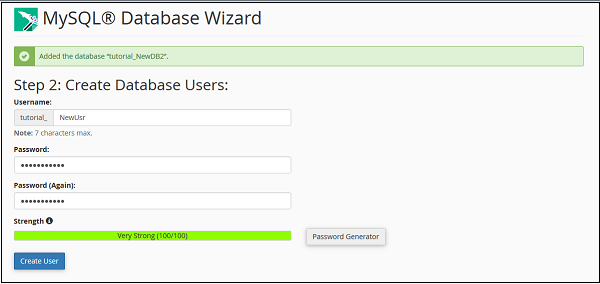
Step 3 − Add user to the database by granting all the privileges to the user for accessing and modifying the data. Select ALL PRIVILEGES checkbox and click Next Step, when done.
Step 4 − You will get a success message if everything works fine.
To modify the database created using MySQL Database Wizard, you can always use MySQL Databases interface.
cPanel - phpMyAdmin
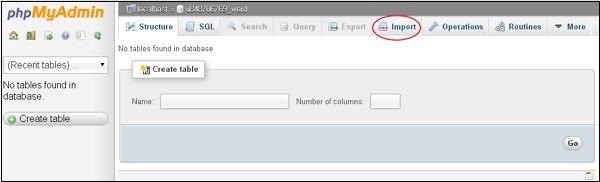
The phpMyAdmin is a third-party tool to manage tables and data inside a database. It is graphical user interface to manage MySQL databases. You can manually create Tables, Import and Export data or edit the values of a row through it.
To access phpMyAdmin, click on the phpMyAdmin link, which can be found under the databases section of cPanel Home.

You will see a dashboard similar to this.
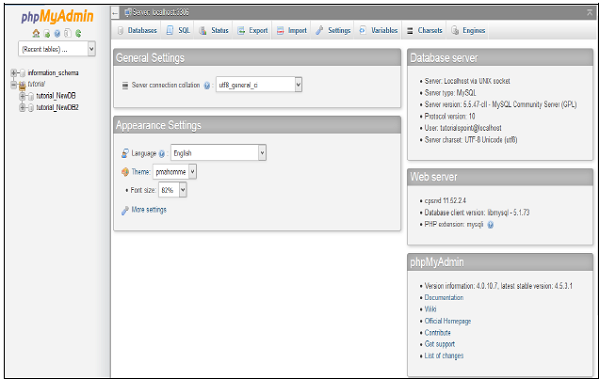
On the left hand pane, there is a list of databases, which can be expended to see the table in each database. On the right hand pane, there is general information of Database server.
Execute an SQL Query
To execute an SQL Query on a database, we will need to perform the following steps −
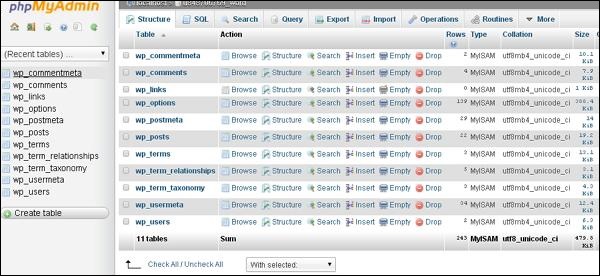
Step 1 − Select the database from left pane by clicking over the name of the database. Once the database is selected, it will show you the structure of the database.
Step 2 − Click on SQL from top bar to open SQL editor.

Step 3 − Write your query into the SQL editor. You can also enter multiple queries, separated by semicolon (;).
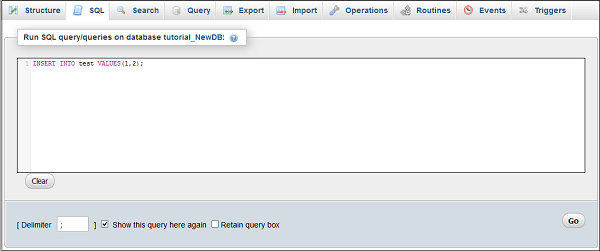
Step 4 − Click Go button to execute the query. If the query is executed successfully, you will get a success message.
cPanel - Remote MySQL
This feature of cPanel allows remote servers or web application to access a database hosted on your account. If a server or web application tries to access the database on your account, which is not provided access to, then cPanel will not allow this host to access your database. But, if you have an application, whom you wish to grant access to your databases, you can add their host names or IP address here.
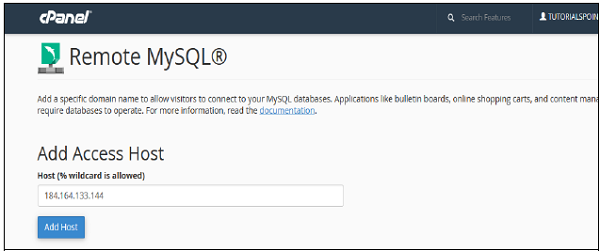
To access this interface, click on Remote MySQL link found in your Database Section of your cPanel.

Add Access Host
To Add Access Host, which can access your databases when needed. You will have to enter Host Name in text input. You can enter hostnames in three types.
- You can use Domain Name, E.g. www.tutorialspoint.com
- You can use IP address, E.g. 184.168.144.133
- You can use wildcard %, E.g. %.tutorialspoint.com or 184.164.144.%
Click on Add Host to add an access host.
Remove Access Host
To deny access to a web application having access to the databases, click the Delete link from the list of Access host.

cPanel - Subdomains
Subdomain is a domain, which is a part of a primary domain and exists in the same server. We can also say it is a second website, which resides under the main domain, however it may or may not have any relation with the root website. we can run a new website under this subdomain.
For Example − The blog.tutorialspoint.com is a subdomain for the root domain tutorialspoint.com and blog.tutorialpoint.com can also be accessed by tutorialpoint.com/blog.
To Create a Subdomain
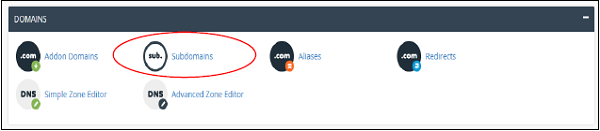
Step 1 − Click Subdomains, which can be found under Domains section.
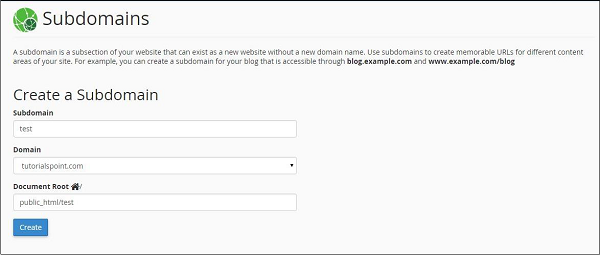
Step 2 − Enter the Subdomain text you want to create. Select the root Domain for your subdomain and the Document Root will be automatically filled according to your Subdomain. You may leave it as it is or you may change it according to your need. Click Create button to create your Subdomain.
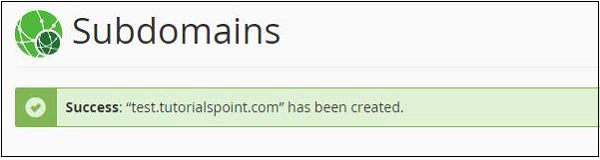
If your subdomain is created successfully, then you will see a Success message like the one shown below.
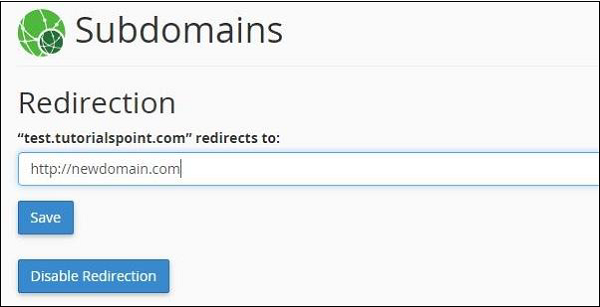
Managing Redirection
If you want your subdomain to point to another domain rather than loading content from your own server, you can do so by clicking Manage Redirection as shown below.
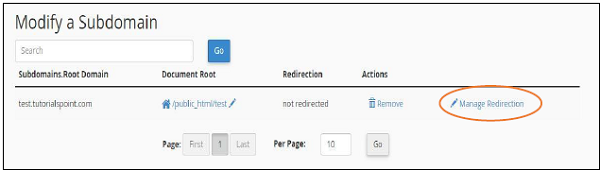
You will be taken to the screen, where you can manage redirection for your subdomain. Enter the new URL, where you want to redirect your subdomain to. Click save and your redirection will be saved successfully. If you want to disable the redirection later on, you may click Disable Redirection.
cPanel - Aliases
This feature of cPanel allows your website to load from another domain. When a user enters the Alias Domain or Parked Domain to access the website, the cPanel automatically redirects them to your main domain and load the main website.
For Example, consider your main domain is www.mymaindomain.com and you have also bought www.myanotherdomain.com and www.mymaindomain.in, and you want to display your same website to these other domains, you have also bought. There is no need to purchase separate hosting for these domains and copy the website to these domains. You can use cPanel Aliases to point these domains to your main domain.
Create an Alias
To create an alias, you will need to follow these steps −
Step 1 − Open cPanel Aliases by clicking on the Aliases link found in Domains Section of cPanel Home.

Step 2 − In the Aliases section, you will see Create New Alias, fill your domain in the text box.
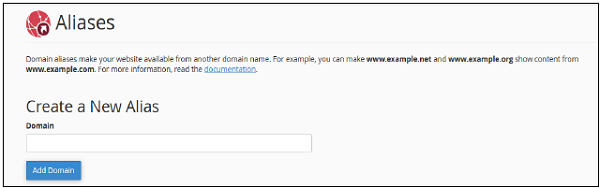
Step 3 − Press Add Domain button to add an alias, if successful you will see a success message.
Note − 1. Domain must be registered already. 2. Domain’s Nameservers must be configure to point at your cPanel account.
Remove Aliases
To remove alias created before, you need to follow these steps −
Step 1 − Navigate to Remove Aliases Section, which can be found under Remove Aliases.
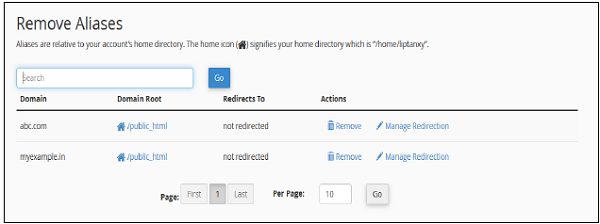
Step 2 − Click on the Remove link from Actions corresponding to the Domain you want to remove and you will see the following remove prompt.

Step 3 − Click on Remove Alias Button, if successful you will see a success message.
cPanel - Addon Domain
Addon Domains are addition domains hosted in your account, stored in subfolders. System treats these domains as a subdomain to your system. If you want to run a whole different website under the same hosting plan, you can use this feature of cPanel. It is the best option to run multiple websites on a single cPanel account. For example, you have a hosting for blogging website, and you want a different website for your CV, you will not need to purchase a different hosting account, but you can use the same hosting for your CV website.
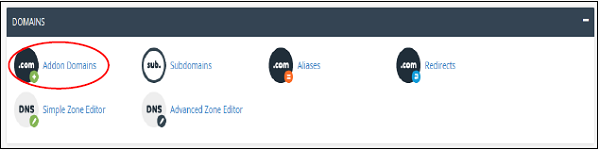
To use this feature, you will need to click Addon Domains link under your Domains section from cPanel Home.
In Addon Domains interface, you can do the following tasks.
Create an Addon Domain
To create an Addon Domain, follow these steps −
Step 1 − Find Create an Addon Domain section in Addon Domains, as shown below.
Step 2 − Fill your domain name in New Domain Name textbox.
Step 3 − Subdomains and Document Root will be automatically filled. Then you can leave the setting as it is or you can change them according to your need.
Step 4 − You can create an FTP account, which will be associated with the Addon Domain. To create an FTP account, select the checkbox on which Create an FTP account associated with this domain is written.

Step 5 − Enter FTP Username and Password to create an FTP account.
Step 6 − Click on the button “Add Domain”, if no error occurs, you will get a success message.
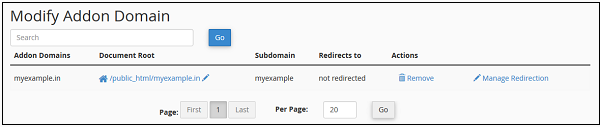
Remove an Addon Domain
To remove an Addon Domain, Scroll down to “Modify Addon Domain” Section and press remove link from Actions corresponding to the Addon Domain.
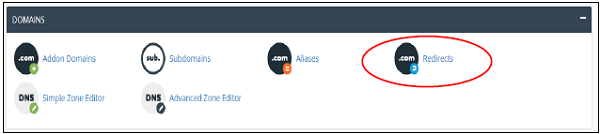
cPanel - Redirect
The redirect interface allows you to send all the visitors or traffic of a Domain or a particular webpage to a new domain. For example, if you moved your website to a new domain and you want to redirect all your visitors to new website, you need to setup redirect. There are two types of redirects available −
Permanent (301) Redirect
This one redirects your visitors to a new website and updates your visitor’s bookmarks. This also directs search engines to your new website. This redirect is permeant and means that page has moved. So, the Search Engine and other crawlers update their data according to the new link. Popularity and SEO of link remains same as the old link had.
Temporary (302) Redirect
This one redirects your visitors to a new website, but does not update your visitor’s bookmark. Search Engines still index your original website. This redirect is temporary and search engine thinks that the new link is going to get removed, hence it does not have same popularity like the old link.
Create a Redirect
To create a redirect, please follow these steps −
Step 1 − Click on Redirects found in Domains section of cPanel Home.
Step 2 − Choose your redirect type from the Dropdown Menu, Permanent or Temporary Redirect.

Step 3 − Choose the Domain Name you want to redirect from the Dropdown menu of lists of domain.
Step 4 − In the next textbox, enter the path of page or path of folder you want to redirect.
Step 5 − Enter full URL of the page your domain will be redirected to, in Redirect to textbox. You will also need to specify the protocol as well, http:// or https://.
Step 6 − Select www. redirection, it determines that if you want your domain to be redirected with www or not. Explanations of options given below.
-
Only redirect with www. − This redirect will be done only if user has entered www. in URL.
-
Redirect with or without www. − This redirect will always be done, does not depends on whether user has entered www. in URL or not.
-
Do not redirect www. − This redirect will not work, if the user has entered www. in URL.
Choose your option accordingly, recommended is that you use Redirect with or without www.
Step 7 − Select Wild Card Redirection checkbox, if you want to redirect all files and folders in sub folder to the same file or folder in new domain. For example, with wildcard redirection www.example.com/pic.jpg will redirect to www.new–example.com/pic.jpg. Without wildcard redirection www.example.com/pic.jpg will redirect to Select the checkbox accordingly.
Step 8 − Click on Add button to save the settings.
cPanel - Simple Zone Editor
DNS (Domain Name System) is a very essential part of Internet System. It simply maps a FQDN (Full Qualified Domain Name), which is in human readable form. For example, www.tutorialspoint.com to IP address, which are used by computer machine, e.g. 117.18.237.191. For this process, DNS uses zone files that are stored in servers, which contains resource records to map a domain name to an IP address.
In this Simple Zone Editor, we can add two types of records −
Add an A Record
The A types of resource records are Host Name records. They contain the IP address of a specific host, and maps the Domain Name with 32-bit IP address.
To add an A type record, perform the following steps −
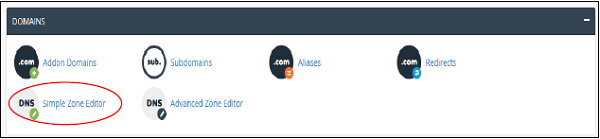
Step 1 − Open the Editor by clicking Simple Zone Editor found in Domains Section of cPanel Home.
Step 2 − Find Add an A Record in the Simple Zone Editor interface.
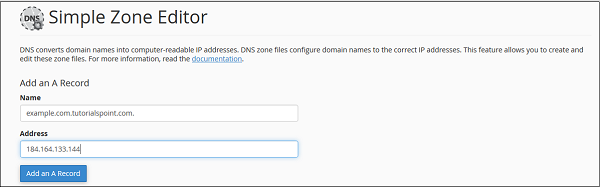
Step 3 − Enter Name in Name textbox and IP address in Address textbox.
Step 4 − Press Add an A Record. If successful, you will get a success message.
Note − ‘A’ records are essential for accessing your website. They allow DNS servers to locate your website and its services. Without an ‘A’ record, visitors can’t access your website. The cPanel automatically configures A type records for your domain and website, as soon as they are created.
Add a CNAME Record
The CNAME records are used to add an Alias to its associated domain name. You can point multiple CNAME records to a single A record. So that when the DNS looks up for the Alias, you can simply rename a host, which is defined in the A records.
To add a CNAME record, please follow these steps.
Step 1 − Scroll down on Simple Zone Editor to find Add a CNAME Record.
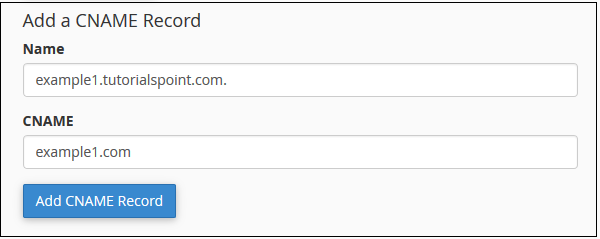
Step 2 − Enter the desired Alias name for CNAME record on Name textbox and Enter a FQDN in CNAME textbox to which you want your Alias pointing to.
Step 3 − Click Add CNAME Record and you should see a success message.
Remove an A or CNAME Record
To remove a user defined A or CNAME Record, please scroll below on Simple Zone Editor to find User–Defined Records. Press the Delete link corresponding to the Record you want to remove.
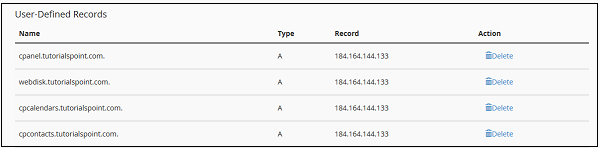
You should see a success message when record is deleted.
cPanel - Advance Zone Editor
This interface is the advanced version of Simple Zone Editor, which we have gone through in the previous chapter. We can add, edit or delete various types of records here, which are A, AAAA, CNAME (Conical Name Record), SRV (Service Record), TXT (Text Record). We can also configure TTL (Time to Live) with records in this interface.
TTL (Time to Live) indicates the time duration that DNS servers can cache resource records prior to discarding the information.
Reset Zone Files
This option resets every change that you made in your cPanel account regarding DNS records. It also resets the changes made using Simple Zone Editor.
To reset Zone Files, follow these steps −
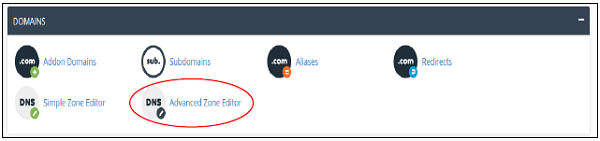
Step 1 − Navigate to cPanel Advanced Zone Editor by clicking on Advanced Zone Editor link found in Domains Section of cPanel Interface.
Step 2 − Find Reset Zone File and click on more link.

Step 3 − It will show you a warning that all modifications in Zone files will be erased. Select the checkbox for the Are you sure you want to erase all entries and revert to the default state?
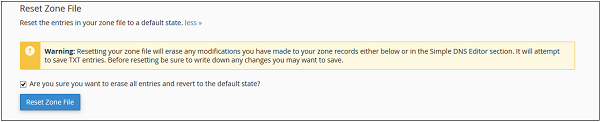
Step 4 − Press Reset Zone File button to reset the zone file to their default state. If successful, you will see a success message shown below.

Add an A record
The ‘A’ type of resource records are Host Name records. They contain the IP address of a specific host and map the Domain Name with 32-bit IP address.
To add an A record, follow these steps.
Step 1 − Find Add a Record Section in the Advance Zone Editor.
Step 2 − Select Record ‘Type A’ from Type Dropdown Menu.

Step 3 − Enter Name of your A record. Enter TTL value, if there is no specific need, you can use default which is 14400. Also enter IP address of record in the Address textbox.
Step 4 − Click Add Record to save the record in the DNS entries.
Add an AAAA Record
The AAAA resource records bind hostnames with IPv6 Address, which is a 128-bit IP address.
Step 1 − Find Add a Record Section in the Advance Zone Editor.
Step 2 − Select Record type from AAAA the dropdown menu.
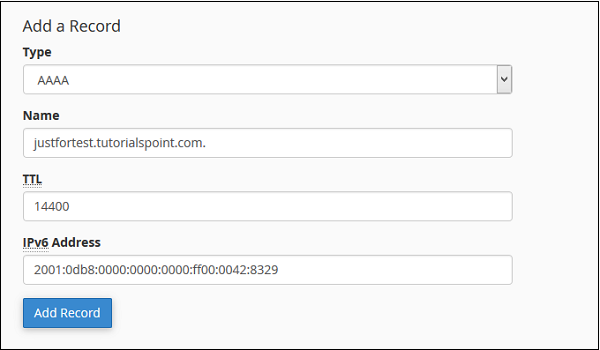
Step 3 − Enter the Hostname in the Name textbox and TTL value in the TTL textbox, unless required use default TTL value, which is 14400.
Step 4 − Enter 128-bit IPv6 address in IPv6 Address textbox to which you want your hostname to bind.
Step 5 − Click Add Record to save this AAAA record in your DNS entries.
Add a CNAME Record
CNAME records are used to add an Alias to its associated domain name. You can point multiple CNAME records to a single A record so that when the DNS looks up for the Alias, you can simply rename a host, which is defined in A records.
To add a CNAME record, please follow these steps.
Step 1 − Find Add a Record Section in the Advance Zone Editor.
Step 2 − Select Record type CNAME from dropdown menu.

Step 3 − Enter your Subdomain or Alias to Name text input, also provide TTL value in TTL textbox, unless required use default TTL value, which is 14400.
Step 4 − Enter a valid zone name or domain name to which you want this Alias to point to, in the CNAME textbox.
Step 5 − Press Add Record Button to save this CNAME record to your DNS entries.
Add an SRV Record
This resource record provides information about available services in the specific ports of your server. They associate the location of a service with details on how the service can be contacted on a specific domain. An SRV record must point to a hostname with an A record.
To add an SRV record, please follow these steps.
Step 1 − Find Add a Record Section in the Advance Zone Editor.
Step 2 − Select Record type SRV from dropdown menu.
Step 3 − Enter Name of Service and Protocol both preceded by an underscore (_) and separated by dot (.).
Step 4 − Provide TTL value in TTL textbox, unless required use default TTL value, which is 14400.
Step 5 − Provide Priority of the Service, the lower the number in priority, higher is the priority of the service. 0 (zero) has the highest priority.
Step 6 − Enter Weight of the service, it is used by zone administrators to distribute the load to multiple targets. 0 is the lowest load.
Step 7 − Enter the Port on which service is actually offered.
Step 8 − Enter Target, it is the name of the host that will receive this service.
Step 9 − Press Add Record to add this SRV record into your DNS entries.
Add a TXT Record
The TXT records can hold any type of text. A domain name can have many TXT records, most common TXT records are used to define SPF (Sender Policy Framework) or DKIM, which is used for Email Authentication.
To add a TXT record, please follow these steps.
Step 1 − Find Add a Record Section in the Advance Zone Editor.
Step 2 − Select Record type TXT from the dropdown menu.
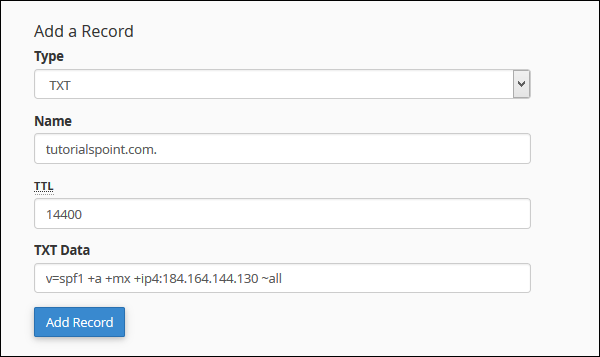
Step 3 − Enter Valid DNS Zone name in Name textbox.
Step 4 − Provide TTL value in TTL textbox, unless required use default TTL value, which is 14400.
Step 5 − Enter TXT Data, it can be any type of text, or a SPF or DKIM data.
Step 6 − Press Add Record Button to add this TXT record to DNS records.
Edit or Delete a DNS Record
To edit or Delete a DNS record, you added earlier. Follow these steps −
Step 1 − Scroll down to Zone File Records in Advanced Zone Editor.
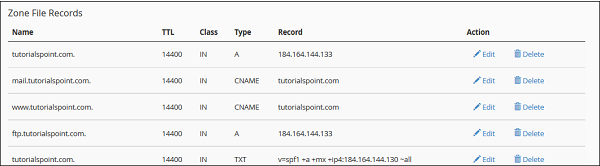
Step 2 − Find the DNS resource record you wish to edit or delete from the list of records.
Step 3 − To Edit an entry, click Edit Link from Action, which is corresponding to the record you wish to edit.
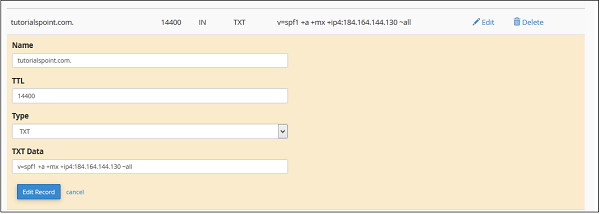
Step 4 − Edit your record according to your need and Click Edit Record button to save the changes.
Step 5 − To delete a record click on Delete link corresponding to the record you wish to delete.

Step 6 − You will be asked for confirmation, press Delete button to delete the record.
cPanel - Email Accounts
You can create and manage email accounts of your domain through this interface. You can Create email address, configure your mail client, change your passwords and access your webmail directly.
Create an Email Address
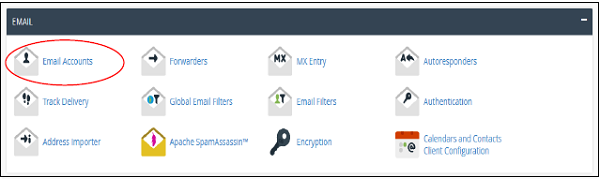
To create an email address for your domain, follow these steps −
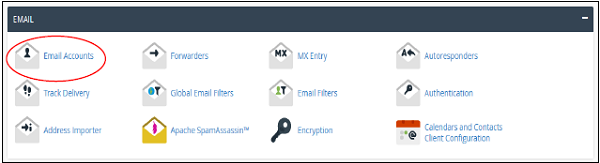
Step 1 − Click on Email Accounts link found in your Emails section of the cPanel Home.
Step 2 − In Email Accounts, you will find Add Email Account on the Top.
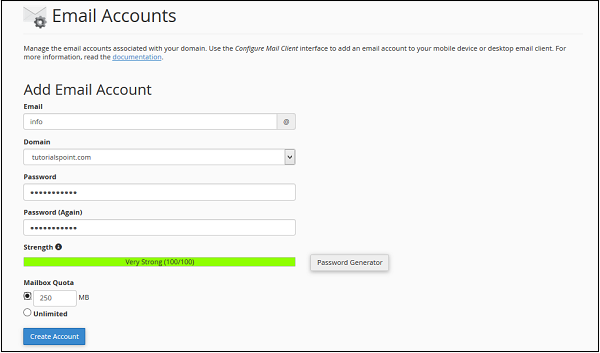
Step 3 − Add Email name you want to create as it will be the text that comes before @.
Step 4 − Choose a strong password and supply Mailbox Quota. It defines how much disk space this account can use. You can provide specific amount of space in MB or you can provide an unlimited quota for this.
Step 5 − Click on Create Account to create an Email address associated with your domain.
Manage Email Accounts
You can manage your email accounts through this interface, you can change your passwords, change quota amount or delete the email account.
To manage your email accounts, scroll down to see the list of Email accounts that exist with your domain.
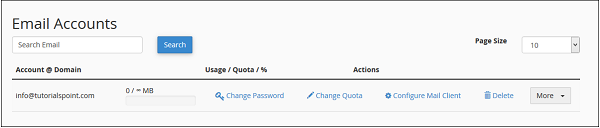
Change Passwords
To change your email accounts password, click Change Password link corresponding to your email address.
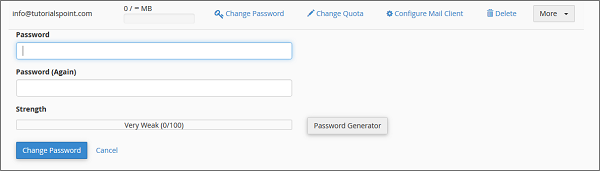
Enter New Passwords, and save changes by pressing Change Password button.
Change Quota
To change your email quota, click on link Change Quota corresponding to your email address that you want to manage.

Enter limited quota in Megabytes or select unlimited option. Press Change Quota Button so save the changes.
Configure Mail Client
To send and receive emails with your domain from any desktop or mobile email client, e.g. Windows Live Mail, Outlook or iOS of iPhone etc. cPanel provides you preconfigured setting for these applications. You just need to download the settings and run it, then it will automatically configure the email client. You may need to enter your email account password. You can also manually configure the email clients for sending and receiving emails for your email client.
To download Auto Configuration Scripts or See the manual settings, click on Configure Mail Client link corresponding to your email account.

Once the interface is opened, you will see Auto Configuration Scripts.
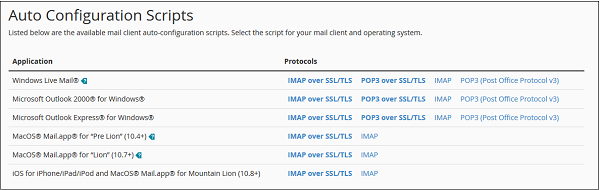
You can download Auto Configuration Scripts for Configure mail client interface. Just download the appropriate settings and run it.
Or if you want to configure your mail client manually, you can scroll down to see the Manual Settings.
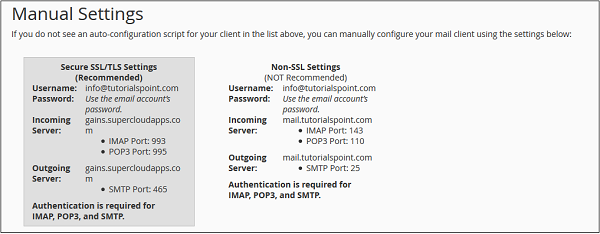
Note − There are four types of settings – IMAP and POP3, both over SSL/TLS and Non-SSL too. Using SSL sends your messages with encryption providing extra layer of security, but Non SSL does not. It is recommended that you use settings with SSL. From IMAP or POP3, you can choose anyone you want. Both will work perfectly.
Delete an Email Account
To delete an email account, just click on Delete link corresponding to your email account.

It will ask for confirmation. Press the Delete Button to remove your email account.
cPanel - Email Forwarders
You can create multiple email account in your cPanel email as per your need. When the number of emails accounts get higher, you will need to open each account to view the emails received. To overcome this issue, you can forward the copy these emails of one account to another account, so now you will have to only open one account to view all the emails. You can also discard the email or send it to a program. You can also forward all the emails of your domains to another domain.
E.g. you have several email ids’ like info@tutorialspoint.com admin@tutorialspoint.com or support@tutorialspoint.com Instead of opening 3 mailboxes to check emails, you can you can forward the last two to info@tutorialspoint.com. Now you will only have to access info@tutorialspoint.com.
Create an Email Forwarder
There are two types of forwarders available, first to forward an email account to another one. Second is to forward all emails to a domain.
Create an Email Account Forwarder
Step 1 − Open Email Forwarders by clicking on the link of Forwarders found in cPanel Home.

Step 2 − In the Forwarders Interface, you will find Create an Email Account Forwarder.

Step 3 − Press Add Forwarder Button, it will take you to a similar interface like this.
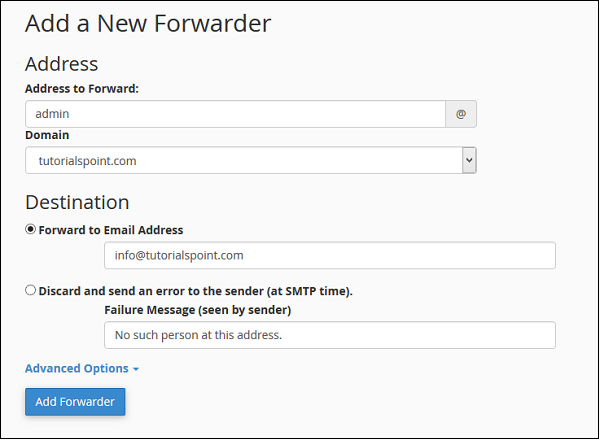
Step 4 − Enter the Address of the email which you want to forward. It is not necessary that the email must be already created. If you do not create an email and forward it to somewhere, the only difference will be that your emails will not be stored in the mailbox of the original email, because that mailbox will not exist.
Step 5 − Enter destination where you want your email to be forwarded.
-
Select Forward to Email Address and fill the textbox with an existing email, where you want your emails to be received.
-
Select Discard and send an error to sender. If you want to discard that message and supply a failure message to sender. You can also customize the Failure message, enter the message in textbox.
In Advance Options −

-
Select Forward to a System Account, if you want your emails to be sent to a system account, and provide a system account name.
-
Select Pipe to a program, if you want your emails to send to a program and enter path name of your program with file extension.
-
Select Discard and system will simply discard the email and will do nothing. Select your choice accordingly.
Step 6 − Click Add Forwarder to save the changes you made.
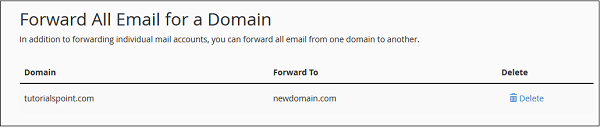
Add Domain Forwarder
You can forward all the emails of your domain to another domain. On the domain, who will receive the emails, you can change the default email address of that domain to a single email, which then can receive all the emails sent from your domain of which you forwarded the emails.
Step 1 − Click on Add Domain Forwarder button, which can be found under Create an Email Forwarder of Forwarder interface.

Step 2 − In Add New Domain Interface, select the domain you want to forward.
Step 3 − In the textbox next to your domain, enter the domain on which you will be receiving the emails.
Step 4 − Press Add Domain Forwarder button to save the changes.
Delete an Email Forwarder
To delete an email forwarder, click on delete link corresponding to the forwarder you want to delete.
For Email account forwarder −
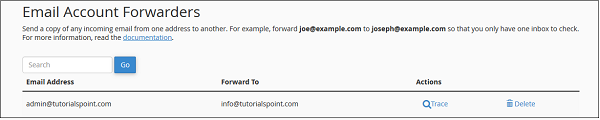
For Domain Forwarders −
It will ask for your permission before deleting the forwarders, click Delete Forwarder to delete the Email Forwarder.
cPanel - Webmail
Webmail is a web-based email client, which allows you to access your emails through any browser or any computer. This is very helpful when you do not have access to your computer on which your email is setup, you can login to your account from anywhere to read your emails and to quickly respond.
Opening Your Webmail
There are two options through which you can login to your webmail client.
Through cPanel Interface
Follow these steps to login to your webmail client −
Step 1 − Login to your cPanel and click on Email Accounts found under the Email section.
Step 2 − Scroll down to find list of Email Accounts.

Step 3 − Click on More button at the corresponding email address of which you want to access webmail.

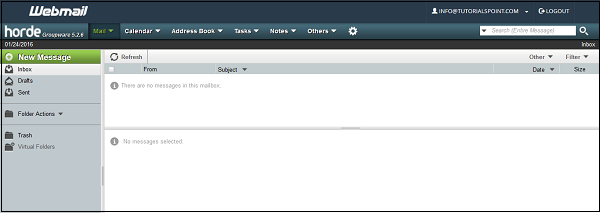
Step 4 − Click on Access Webmail and the system will automatically log you into the webmail in a new tab.
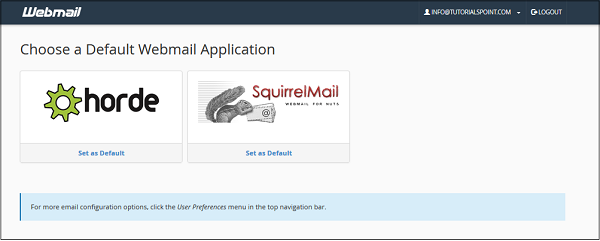
Step 5 − Choose any Webmail application. You can also set a default Webmail application, so whenever you log into your webmail, your default webmail application will automatically load.
Note − I have chosen horde to load webmail
Access webmail directly
To access webmail directly without logging into cPanel, you can use the following steps −
Step 1 − Navigate to https://your–domain.com:2096 or https://webmail.your–domain.com through your browsers address bar.
Step 2 − Webmail login screen will appear, Enter your Email and Password of your email account.
Step 3 − Press Log in button to login into your web based email client, you will get same interface as we got above.
cPanel - MX Entry
This feature of cPanel allows to route all your emails to a specific server. Changes you make here also get reflected in the domain’s DNS entries. This feature is important to create a backup server for your domain’s mail server to receive when your main server is down. You can setup MX entries here to route your mail to Google mail servers when you use Google Apps to manage your emails.
Use this interface to manage your MX entries and Email Routing
Configure Email Routing
To configure the email routing for your domain, follow these steps −
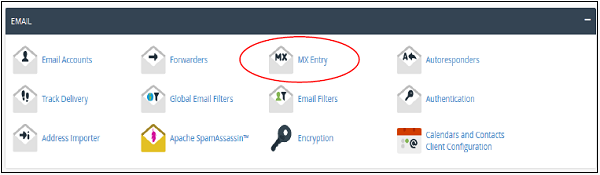
Step 1 − Open cPanel MX Entries by clicking MX Entry from Email Section of cPanel Interface.
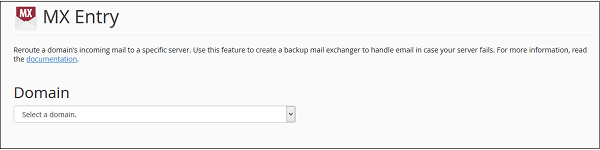
Step 2 − Select the domain for which you want to configure Email Routing.
Step 3 − When you will select the domain from the drop down, Email Routing setting will appear. The current applied setting is displayed bold.
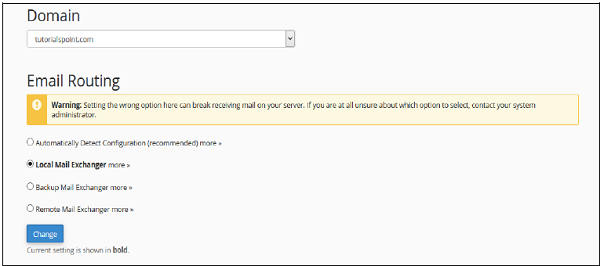
Step 4 − Change your current setting only when you need it. Select any of these four options according to your need.
-
Automatically Detect Configuration − This enables the cPanel to automatically detect the best settings according to priorities of your MX records.
-
Local Mail Exchanger − This enables your server to receive emails, even if any MX entry of higher priority is found. In this case, emails are sent to both domains.
-
Backup Mail Exchanger − In this case, your server acts as backup mail exchanger and if your primary mail exchanger is offline, then it holds the emails until your primary server is back online. You need to have a proper MX Entry for your primary mail exchanger.
-
Remote Mail Exchanger − In this case, your domain does not accept any mail and reroutes them to your primary email server.
Step 5 − Click Change and your new setting will appear in bold letters.
Add an MX Record
To add a, MX record, follow these steps −
Step 1 − Scroll down to Add New Record on MX Entry page.
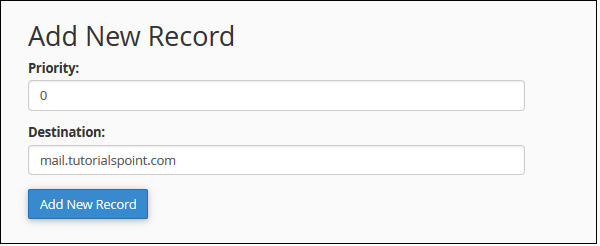
Step 2 − Enter Priority of MX record, lower the number – higher the priority. Zero has the highest Priority.
Step 3 − Enter Destination Domain to which you want to reroute your emails.
Step 4 − Click Add New Record to add a new MX record.
Edit or Remove an MX Record
To edit or remove click Edit or Remove link in Actions corresponding to the MX entry that you want to edit or delete.

When you will click Edit, it will ask you for the Priority and Domain, change what you need to change and finally click Edit to save the changes.
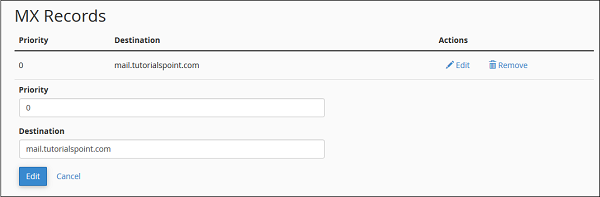
When you click Remove link, it will ask you for confirmation. Click Delete to remove the entry.

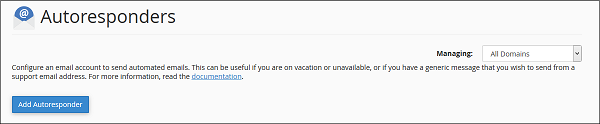
cPanel - Autoresponders
You can add or modify Autoresponders for your email accounts through this interface. You can configure an email to send an automated reply to all emails you receive to your email account. You can make an automated reply to say that you have received the email and you will reply soon.
If you are on vacation, you can configure the Autoresponders to reply that you are not available at this moment etc. you can also set a specific duration of time in which the automated reply will be sent.
Add an Autoresponder
To add an autoresponder, follow these steps −
Step 1 − Open cPanel Autoresponders by clicking on Autoresponder link found in Email section of cPanel Home.

Step 2 − Click Add Autoresponder in this section. It will take you to Modify/Add Autoresponders.
Step 3 − Choose character set, recommended is that you leave it as it is, which is utf–8.
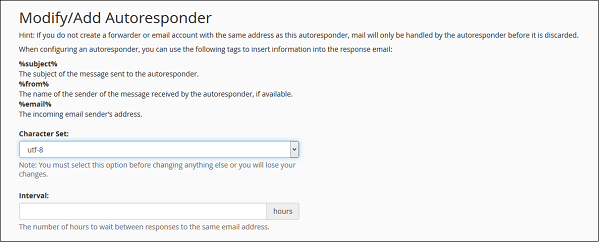
Step 4 − Enter the number of hours to wait between responses to same email address, this helps in preventing sending same email to same user multiple times.
Step 5 − Enter Email and select Domain for which you want to add an autoresponder.
Step 6 − Enter outgoing email’s sender name, it may be your name or your company’s.
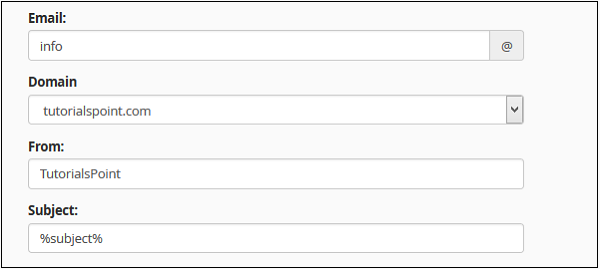
Step 7 − Enter Subject of your outgoing Email. You may keep it same as incoming email by putting %subject% in Subject, you can provide your custom subject too.
Step 8 − Enter Body of your Email. You may use %from%, which will be the name of sender, if available. You may use %email% in body too, it will be the email address of the sender.

Step 9 − Select This message contains HTML checkbox, if there is HTML in your Email Body.
Step 10 − Schedule a Start, End Date, and Time for your autoresponder email. You can choose to start immediately or on a specific date at a specific time. You can choose this autoresponder to stop sending emails on a specific day, or you can choose never to stop an autoresponder. You can change this configuration anytime.
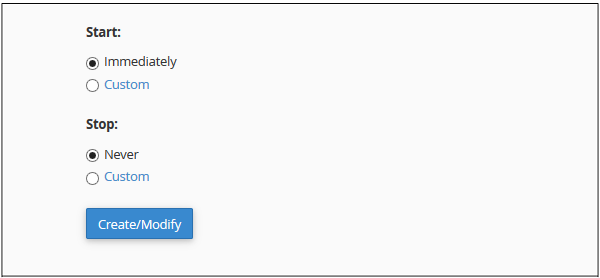
Step 11 − Press Create/Modify button to create an autoresponder.
Edit or Delete Autoresponder
To edit or delete an autoresponder, find the Current Autoresponder by scrolling down in Autoresponder section.
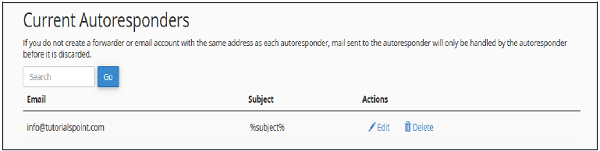
Click Edit corresponding to the autoresponder to edit and it will take you to the same interface, which we have gone through when creating the Autoresponder. You can use the same interface to make the change.
To delete an autoresponder, click Delete corresponding to that autoresponder. It will ask you for confirmation, click Delete to delete that autoresponder.
cPanel - Track Delivery
This Interface of cPanel is used to see delivery reports of emails. This interface can show the errors, while sending your email. You can also see spam scores of your emails. A spam score is provided by Apache Spamassassin. You can also check the emails delivery route to help you identify any problems in the delivery attempt.
To track an email delivery, open cPanel Track Delivery by clicking on Track Delivery link found in the Email Section of cPanel.

In track Delivery interface, you will see a table of email sending events.
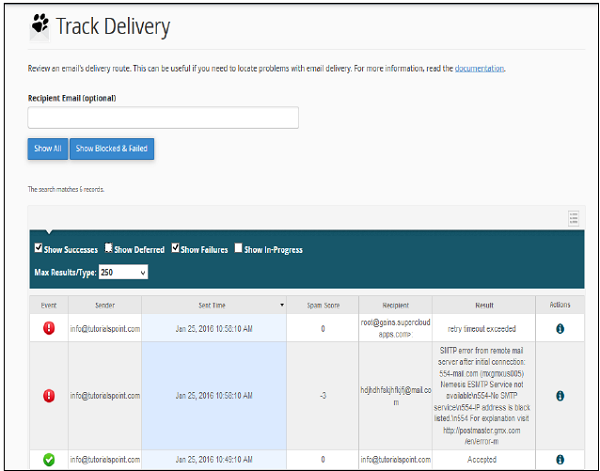
If you wish to filter the table for a single recipient email, you may do so by entering a recipient’s email in Recipient Email (optional), and then click Show All button to show the email related to a specific recipient. To view all emails again, remove the email from Recipient Email and Click Show All, it will again show all the records.
There are four main types of filters, which you can apply to a list.
-
Show Success − This will show all the emails that are successfully delivered to the destination.
-
Show Deferred − This will show you all emails with a warning, which are the system deferred emails.
-
Show Failures − It will show you the emails, which are not delivered to the destination. It will also show any other errors during transmission of emails.
-
Show In–Progress − This will show you all the emails, which are currently transmitting.
You can combine these filters too as and how they are required.
The following table shows the default information about emails −
| Sr.No | Emails & Description |
| 1 |
Event
This column shows icon of success, failure or deferred emails.
|
| 2 |
Sender
It shows the email address of email sender.
|
| 3 |
Sent time
It shows the date and time on which email was sent.
|
| 4 |
Spam Score
It shows Apache Spamassassin spam score.
|
| 5 |
Recipient
It shows the email of recipient.
|
| 6 |
Result
Important column − it shows the error encountered by the system, while sending the email. This message describes the delivery results
|
| 7 |
Action
An information Icon, which on clicking shows the details of the report.
|
To view more information of an email delivery report, click information icon shown at the action column next to the corresponding report.

And you will see the details of the delivery record as shown below.
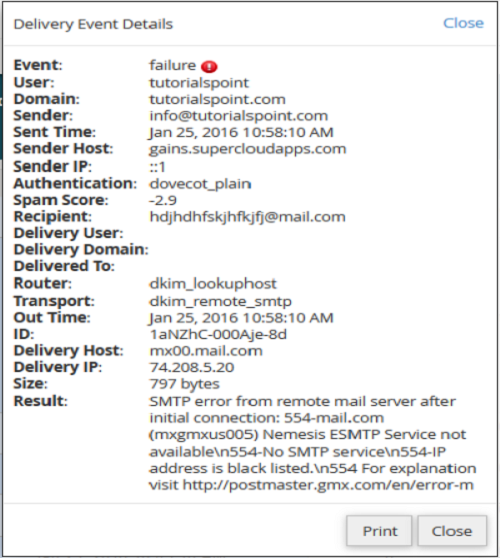
cPanel - Email Filters
Email filters are useful to create rules to block unwanted emails, based on certain rules you choose. You can specify some rules like a message containing a specific word should be deleted or passed to a specific program. These filters work subsequently, for example if a mail passes through a filter, but can be blocked by another filter. You can specify multiple rules in one filter too.
There are two types of Email Filters in cPanel − User Level Filter and Account Level Filter.
User Level Filter
Through this user level filter, you can create email filters, which will apply on emails that will be received by that email address.
Create a User Level Filter
To create a user level email filter, follow these steps −
Step 1 − Open user level email filters by clicking on Email Filter found under Email section of cPanel.

Step 2 − In Email Filters, you will see the list of emails associated with your domain. Click on Manage Filter link corresponding to your email on which you want to create a filter.
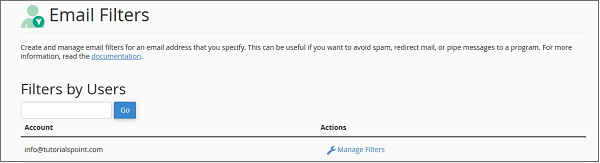
Step 3 − Click on Create New Filter button to go to a new filter creation interface.
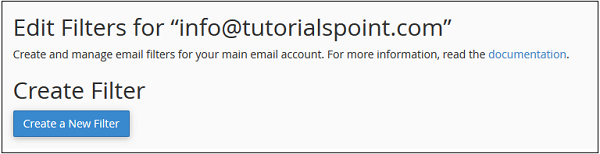
Step 4 − Provide a name for your filter.

Step 5 − Select rules for filtering your message. To add additional rules, click on Add (+) button on right side, to remove rules click Subtract (–). Also choose ‘and’ or ‘or’ rule.
Step 6 − Select an Action for a message those passes to the rules of filter. To add additional rules, click on Add (+) button on right side, to remove rules click Subtract (–).
Step 7 − Click on Create button to create a filter.
Edit or Delete a User Level Filter
To edit or delete a user level filter −
Step 1 − Return to Email Filter Interface.
Step 2 − Choose the email for which you want to edit or delete the Filter from Current Filters.

Step 3 −
-
To Edit, click Edit Link and you will be taken to the same interface we went through to create an Email Filter. Click Save to Save the Email Filter.
-
To Delete the Email Filter, click on Delete link and you will be asked for confirmation. Click Delete to delete an Email Filter.
Testing an Email Filter
To test the filter, you can follow these steps −
Step 1 − Return to Email Filters Interface and Click on the Manage link corresponding to email address of which you want to test filter.
Step 2 − Scroll down to find Filter Test.
Step 3 − Enter complete Email with headers and subjects in Filter Email text input.
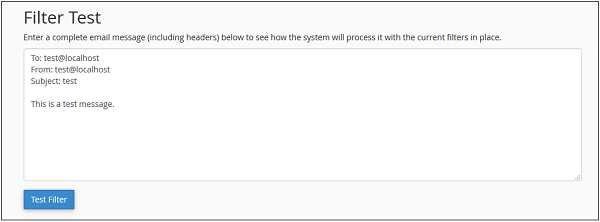
Step 4 − Press Test Filter and the system will generate a full report of how the filters will respond to the email you have written.
Account Level Filtering
The only difference in User Level Filtering and Account Level Filtering (or Global Email Filtering) is that the filters used in Account Level Filter will filter all emails received in your domain, no matter to which email address the message was sent.
To Create and Manage Global Email Filter click on Global Email Filter found under Email section of cPanel Home.

Process to Create, Manage and Test a Global Email Filter is same as we studied above in User Level Filtering. Only difference is that you will not find a list of Emails to choose to Manage, but you will get a list of all Global Email Filters.
cPanel - Authentications
Email Authentications prevent the email from going into the spam folder of recipients. cPanel uses DKIM and SPF to reduce the amount of spam mails. Enabling these features will prevent spammers from forging messages that claims to be coming from your domain.
DKIM
Domain Key Identification Mechanism (DKIM) verifies your incoming emails to check whether they are same as they were before when they were sent. This means, if they are altered during the transit. It also checks whether they are from the same address, whom they claim to be. This feature prevents incoming spam emails.
When DKIM is enabled, the sender signs the email with a digital signature using a private key. When the email approaches the recipient, it retrieves the public key of its sender and checks if the signature matches. If the signature is invalid, then message is treated as a spam message.
Enabling DKIM
To enable DKIM follow these steps −
Step 1 − Open Email Authentication by clicking Authentication found under Mail Section of cPanel Home.
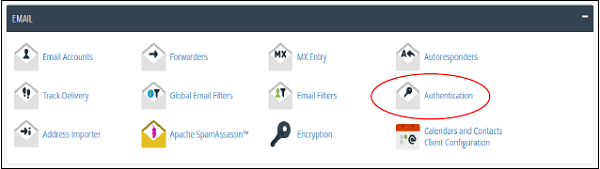
Step 2 − Find DKIM settings, if disabled then, click Enable button to Enable DKIM.

Disable DKIM
To disable DKIM follow these steps −
Step 1 − Open Email Authentication by clicking Authentication found under Mail Section of cPanel Home.
Step 2 − Find DKIM setting, if enabled, then click Disable button to Disable DKIM.

Note − To Enable DKIM, your Nameservers must point to your hosting. It is recommended that you use DKIM Authentication in your hosting.
SPF
Sender Policy Framework (SPF) helps in preventing outgoing messages to spams. This helps to prevent spammers in creating a message that looks like it is originated through your domain. SPF uses TXT type DNS resource records, which specify the hosts that send emails through your domain.
Enable SPF
To enable SPF, follow these steps −
Step 1 − Open Email Authentication by clicking Authentication found under Mail Section of cPanel Home.
Step 2 − Find SPF setting, if disabled, then click Enable button to Enable SPF.

Disable SPF
To disable SPF, follow these steps −
Step 1 − Open Email Authentication by clicking Authentication found under Mail Section of cPanel Home.
Step 2 − Find SPF setting, if enabled, then click Disable button to disable SPF.

cPanel - Address Importer
cPanel address importer can be used to create multiple email address or forwarders in your account. For example, you have 100 employees in your office and you want each employee to have an email address, then if you have a list of email addresses of employees, then within two clicks, you can create as many email accounts as needed. cPanel address importer supports two type of data import, Excel Spreadsheet (.xls) or Comma separated value sheet (.csv). You can also use this interface import email forwarder list.
Importing Email Addresses
To import email address, follow these steps −
Step 1 − Open cPanel Address Importer by clicking on Address Importer link found in the Email Section.
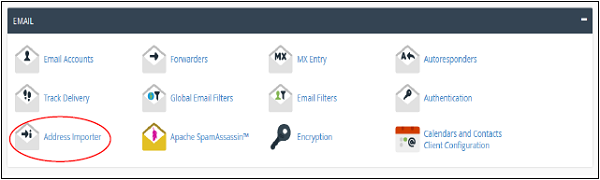
Step 2 − Select the Email address option in What would you like to import.
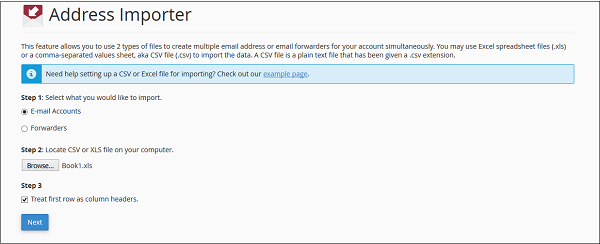
Step 3 − Browse and select your Excel Spreadsheet or CSV file. If you have selected XLS file, then it will only ask to treat the first row as column header, if yes, then select the check box. If you have selected CSV file, then it will ask for the delimiter. In most cases, it is a Comma, choose the one you have, and Click Next.
Note − You can see an example screenshot below. You can create a spreadsheet using Microsoft Excel, and save the spreadsheet using .xls or .csv in Save As menu.
| A | B | C | D |
| 1 |
Email or Name |
Password |
Quota |
|
| 2 |
hello@tutorialspoint.com |
XEsjhjhh1242 |
300 |
|
| 3 |
Liptan Biswas |
|
|
|
| 4 |
test@tutorialspoint.com |
|
|
|
| 5 |
|
|
|
|
Step 4 − In the next step, it will ask you to choose a header for each column, choose an appropriate one. Select the domain in which you want to create the emails. Click Next.
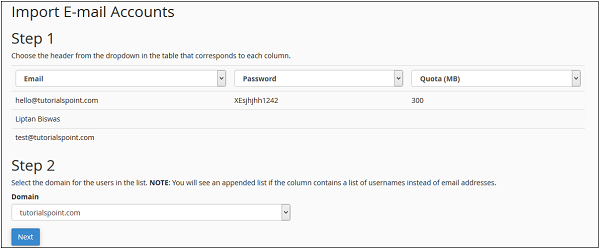
Step 5 − In the final step, it will show you a review of what is going to be created. Review the Table, take a screenshot or print the page, so that you will have a copy of passwords corresponding to the emails.

Note − As you can see above for email column, which we did not provide an appropriate email, cPanel has automatically generated an Email for that name. In the password column, which we did not provide a password, cPanel has automatically generated them. While, in the Quota column, where we did not mention the Quota, cPanel has automatically provided unlimited quota.
Step 6 − Click finish to Import the Email addresses.
Importing Email Forwarders
To import Email forwarders, please follow these steps −
Step 1 − Open cPanel Address Importer by clicking Address Importer link found in the Email Section.
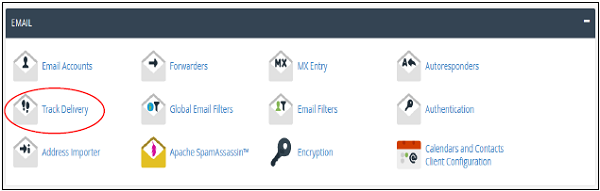
Step 2 − Select Forwarders option in What would you like to import.

Step 3 − Browse and select your Excel Spreadsheet or CSV file. If you have selected XLS file, then it will only ask to treat the first row as the column header, if yes, then select the check box. If you have selected the CSV file, then it will ask for a delimiter. In most cases, it is Comma, choose the one you have, and then Click Next.
Note − You can see an example screenshot below. You can create a spreadsheet using Microsoft Excel, and save the spreadsheet using .xls or .csv in Save As menu.
| A | B |
| 1 |
Forward from |
Forward to |
| 2 |
hello@tutorialspoint.com |
info@tutorialspoint.com |
| 3 |
test2@tutorialspoint.com |
info@tutorialspoint.com |
| 4 |
test@tutorialspoint.com |
info@tutorialspoint.com |
| 5 |
|
|
Step 4 − In the next step, it will ask you to choose a header for each column. Select your source and destination column and click Next.
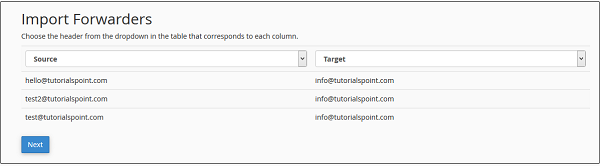
Step 5 − In the final step, it will show you a review of which forwarders are going to be imported. Review the settings.
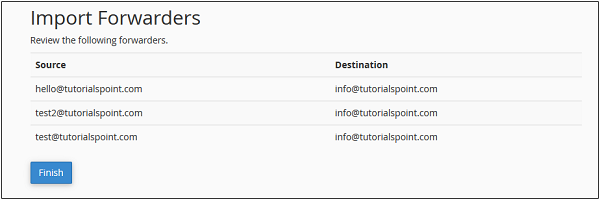
Step 6 − Click finish to Import the Forwarders.
cPanel - Encryption
cPanel supports GnuPG or GNU Privacy Guard, which is an open-source software to encrypt and decrypt messages using cryptographic algorithms. GnuPG uses a public and private key infrastructure to implement this feature.
When the sender sends a message, he encodes it with a public key of the recipient. The recipient after receiving the message, decrypts the message with his private key, which is available in the server. This feature helps in sending emails with sensitive information, as without a private key, it’s nearly impossible to decode the message.
Create a GnuPG Key
To create a GnuPG key, follow these steps −
Step 1 − Open cPanel Email Encryption by clicking on Encryption in the Email section of the cPanel Link.
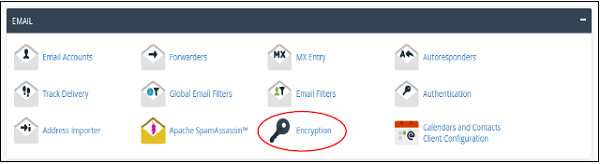
Step 2 − In create a New Key interface, Enter Your name and Email.
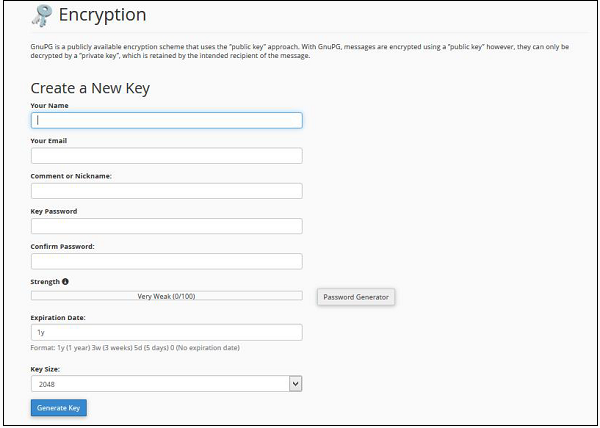
Step 3 − Enter comment or nick name; you can use this to distinguish between multiple keys.
Step 4 − Enter Strong Key Password and Set Expiration Date. Expiration date can be set like
- y for year, e.g. 1y for 1 year
- w for weeks, e.g. 2w for 2 weeks
- d for days, e.g. 4d for 4 days
Step 5 − Select key size from dropdown; larger key sizes are more secure.
Step 6 − Click Generate Key; it will take a few minutes to generate your key.
Import a Key
If you already have a key pair in your local computer, then you can import them to your cPanel. You can only import the Public Key.
To import a GnuPG key, follow these steps −
Step 1 − Scroll down to find Import Key in Encryption Interface.
Step 2 − Click on the Import Key Button. You will be taken to a new interface.
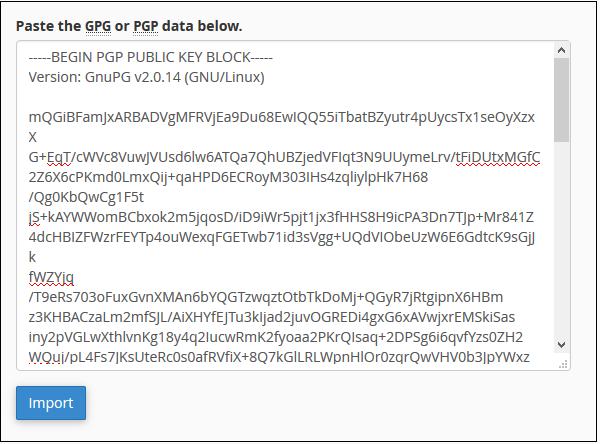
Step 3 − Paste your Public key in the text box; make sure it includes both the header and footer rows.
Step 4 − Click the Import button to import the key.
Delete or View the Key
Step 1 − Scroll down in Encryption Interface to find the list of keys.
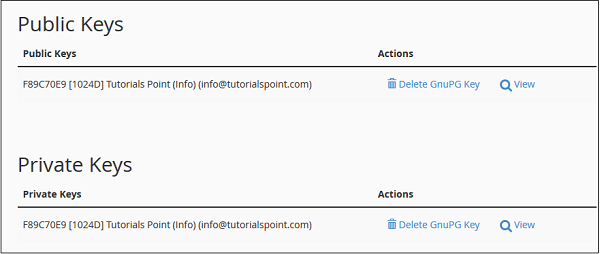
Step 2 − To view a key, click View corresponding to the Key you want to view.
Step 3 − To delete a key, click Delete GnuPG key, it will ask for confirmation, click yes to delete the key.
cPanel - Apache Spamassassin
Apache Spamassassin is a software integrated into the cPanel, which helps to prevent getting spam messages in your mailbox. It helps in preventing your mail box to get flooded with spam messages. When Apache Spamassassin is enabled, it rates every message by a spam score. You can choose the spam emails to auto delete according to spam score. If you choose auto spam deletion with spam score of 5, then all emails having 5 or more spam score will be deleted automatically.
Enable or Disable Apache Spamassassin
To enable Apache Spamassassin, use the following steps −
Step 1 − Click on Apache Spamassassin link found under the Email section of cPanel Home.
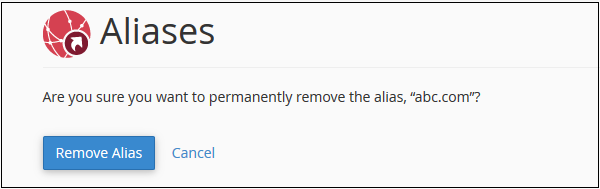
Step 2 − If Apache Spamassassin is currently disabled, then you can enable it by clicking Enable Apache Spamassassin. If it is already enabled, you can disable it by clicking Disable Apache Spamassassin.

Setup Spam Auto–Delete
To setup Spam Auto–Delete, follow these steps −
Step 1 − Find Filter options in Apache Spamassassin Interface.

Step 2 − Select Spam score from dropdown between1 to 10. Lower score is stricter, while higher score is more permissive. This means score 1 will filter many emails and will delete most of the emails you receive and score 10 will allow more emails to pass through the filter.
Step 3 − Click Auto–Delete Spam to enable automatic spam deletion based of your chosen score.
To disable automatic spam deletion, click Disable Auto–Delete Spam.
cPanel - Visitors
This interface of cPanel allows you to view the statics and analytics for your domains. These simple metrics feature helps you to get the idea about your performance and optimize the quality of your websites.
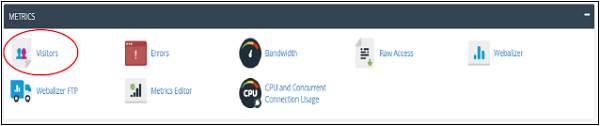
Step 1 − Click on Visitors icon under Metrics section of cPanel Home. You will see the list of domains available.
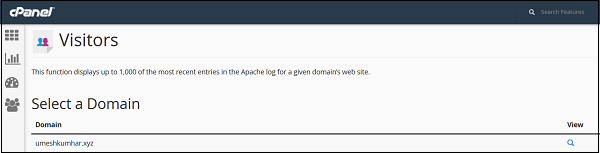
Step 2 − For details related to a particular domain, just click View indicated right after the domain name.
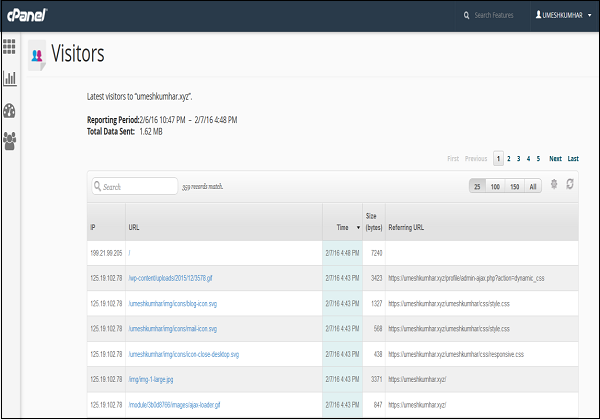
Here the obtained table is divided in five columns i.e. IP (Internet Protocol), URL, Time, Size, Referring URL.
IP (Internet Protocol) − The IP address of the visitor network computer.
URL − It refers to the full URL of the page content.
Timestamp − The date and time when the user visits the particular URL.
Size − The bytes consumed by the user for loading the URL content.
cPanel - Errors
This function will display the last 300 errors for your site. This can be very useful for finding broken links or problems with missing files. Checking this log frequently can help keep your site running smoothly. This can help you to debug your website errors.

It will take you to the following interface.

This list of the errors occurred on this domain related to any issues. In this case there are no errors on this domain. You can frequently check this error log to see if there are any errors related to your website. It will be helpful for you to troubleshoot and resolve the errors.
cPanel - Bandwidth
This function allows you to see the bandwidth usage for your site. It shows the current month’s bandwidth usage, as well as your total bandwidth usage. This will include all HTTP (web) and POP (mail) bandwidth usage, and may include FTP bandwidth usage, if your system administrator has enabled FTP bandwidth logging.
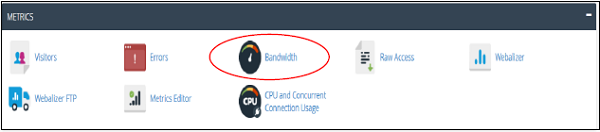
Click the Bandwidth icon and it will take you to an interface. Here, in this interface, you are provided with the monthly bandwidth transfer and represented in form of graphs. This graph is able to display the bandwidth consumed by HTTP, FTP services. This is available in three forms – past 24 hours, past week, past year.
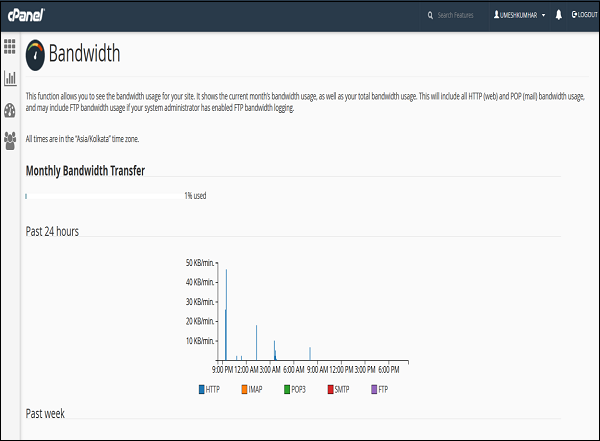
Also, this representation is in the form of pie charts that is on a monthly basis. This data is beneficial to get an idea about the traffic coming in to that domain.

cPanel - Webalizer
Webalizer is a complex statistics based program, which produces a variety of charts and graphs about who has visited your website. This is a sort of analyzer that shows you the data in the form of graphs and pie charts.

Here is a Webalizer interface of the domain listing −

Also the representation is in form of pie charts that is on a monthly basis. This data is beneficial to get an idea about the traffic to the domain. The data values consists of the visits, hits, files, pages that the users have accessed.
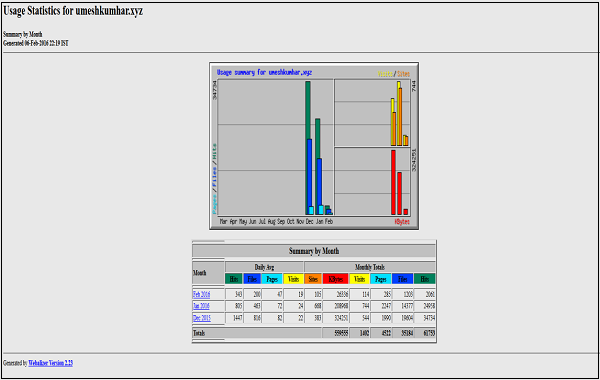
cPanel - Raw Access
Raw Access Logs allow you to see who has visited your website without displaying graphs, charts, or other graphics. You can use the Raw Access Logs menu to download a zipped version of the server’s access log for your site. This can be very useful when you want to quickly see who has visited your site.
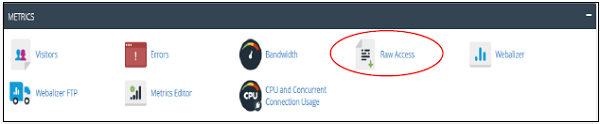
Here is the Raw Access interface of domain listing −
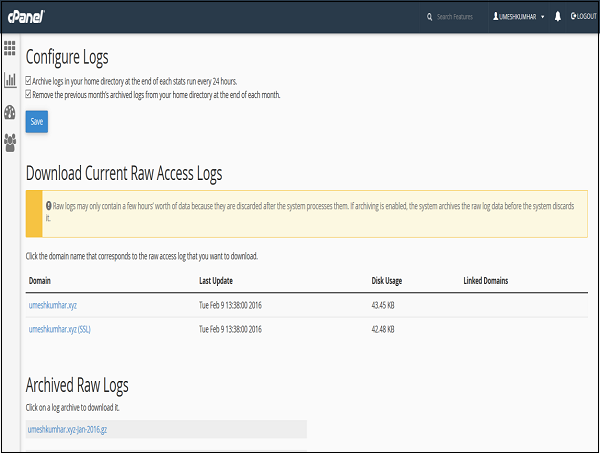
Here, the management of Raw Logs takes place. The archieved logs are available for downloads. You can also configure to remove or archive the raw logs for domains.
cPanel - CPU and Connection Usage
To access your CPU and Concurrent connection usage, click CPU and Concurrent Connection usage under Metrics section of the cPanel home.
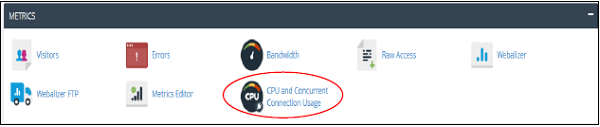
This is the interface of resource usage overview −
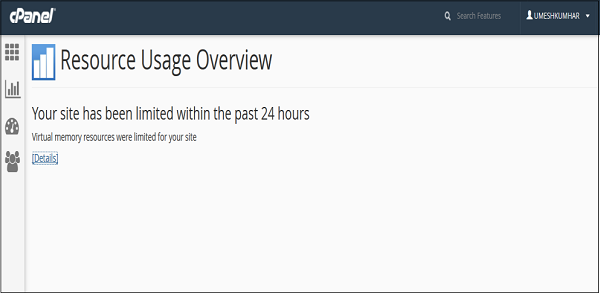
How virtual memory resources are utilizing is represented in the form of graphs and tabular data. The CPU usage with the utilization of the memories. The number of processes taking place with their usage, limit and fault data values. The input/output usage, processors, physical memory, virtual memory, processes and faults are represented as per their usage limits.
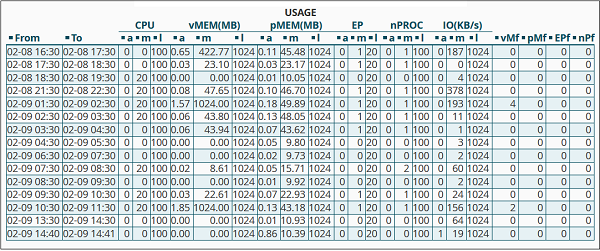
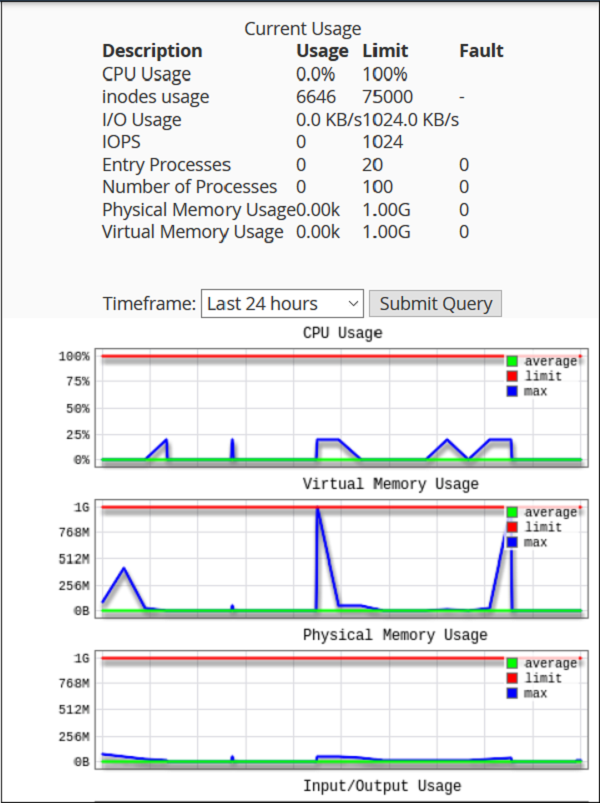
cPanel - IP Blocker
cPanel IP blocker enables you to block your website for a single IP address, domain name or a range of IP address. All those users, who will try to access your website from blocked IP addresses will not be able to access your website. You can manually deny those IP addresses, who are using your website’s bandwidth or doing malicious activity.
Deny Access to an IP Address or Domain
To deny access to a specific IP address or Domain name, follow these steps −
Step 1 − Open cPanel IP Blocker by clicking on the IP Blocker Link found under the security section of cPanel Home.

Step 2 − In Add an IP or Range, enter your IP address or Domain Name or Range.

IP address can be entered in the following formats.
- Single IP address, E.g. 192.168.0.1
- IP address Range, E.g. 192.168.0.1–192.168.0.100 or 192.168.0.1–100
- CIDR format, E.g. 192.168.0.1/32
- Using Wildcard, E.g. 192.168.*.*
- Domain Name, google.com
Step 3 − Press Add Button to block that IP address or Range to access your website.
Remove an IP from the Denied List
You can allow access to a denied IP address or Range, by following these steps −
Step 1 − Open cPanel IP Blocker by clicking on IP Blocker Link found under security section of cPanel Home.

Step 2 − Scroll down to find Currently–Blocked IP Addresses. Find the IP address or Range you want to remove, and click on Delete link.
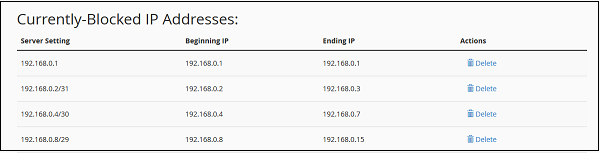
Step 3 − It will ask you for confirmation, click on Remove IP. It will remove the IP from blocked list and will give back the permission to access your site.
cPanel - SSH / TLS
SSL (Socket Security Layer) or TLS (Transport Layer Security) is a mechanism for encrypting data, which is transferring from your computer to host or server and vice versa.
Generate Private Key
Private Key resides at your server and decrypts the incoming data coming from visitor’s device. Without Private Key, your server will not be able to decode the data sent by user. Private Key is automatically generated when generating a CSR.
To generate a Private Key, follow these steps −
Step 1 − Open cPanel SSL/TLS manager, by clicking on SSL/TLS found under the security section of cPanel.

Step 2 − In Private Keys, click on Generate, view, upload, or delete your private keys.
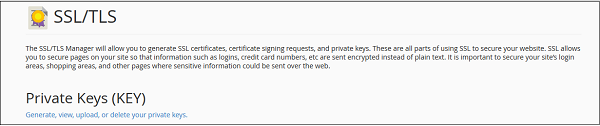
Step 3 − You can use Generate a New Private Key Interface to generate a new key.
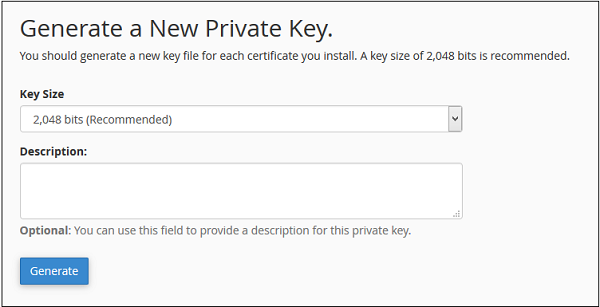
Step 4 − Choose a Key Size from the dropdown menu. Provide a description which is optional, you can leave it blank.
Step 5 − Click on Generate Button to generate a new private key.
Upload a Private Key
To upload a Private Key to your server, you can use the interface below to Generate a New Key Section, which is Upload a New Private Key. Just paste your existing key into textbox and provide a description. Then click Save to import the key.
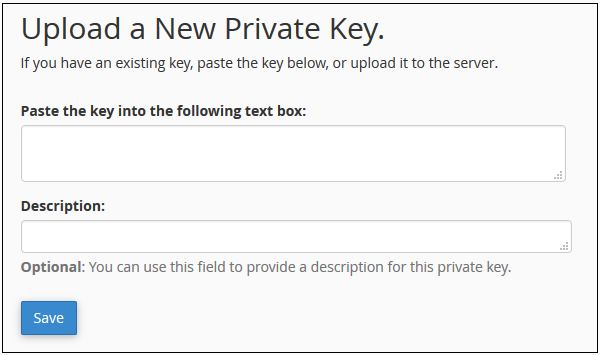
Or if you have an existing private key in ‘.key’ file, you can also import it. Just scroll down to choose a .key file under Upload a New Private Key. Browse for the file and select it. Click Upload button to Import the key into server.

Generate a CSR
CSR (Certificate Signing Request) is an encoded certificate, which CA authorities ask for when we purchase a SSL certificate from them. To issue a SSL certificate they need some additional information, which we provide in the CSR.
To generate a CSR, follow these steps below.
Step 1 − Click SSL/TLS link found under Security section of the cPanel.

Step 2 − Under Certificate Signing Request (CSR) click Generate, view, or delete SSL certificate signing requests.

Step 3 − In SSL Certificate Signing Request Interface, scroll down to see Generate a New Certificate Signing Request (CSR).
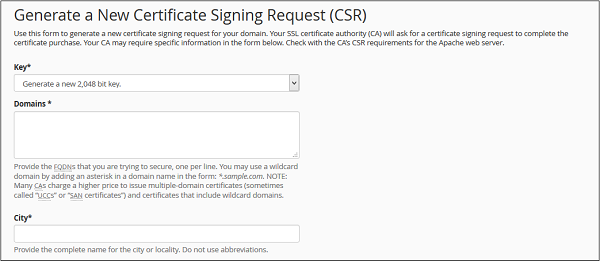
Step 4 − Choose an existing Private Key from Key dropdown. You can also choose to generate a new Private Key.
Step 5 − Enter Domains for which you want to generate CSR. You can choose a wild card domain by putting * as a subdomain. E.g. *.tutorialspoint.com.
Step 6 − Provide all necessary information in text fields like City, State, Country, Company etc.
Step 7 − Click Generate Button to generate a CSR.
Upload an SSL / TLS Certificate
If you have obtained an SSL/TLS certificate from a Trusted Certificate Provider, then you will need to upload it to your server to use it on your website.
To generate Upload a SSL/TLS certificate, follow these steps below −
Step 1 − Click on SSL/TLS link found under Security section of cPanel.
Step 2 − Under Certificates (CRT), click on Generate, view, upload, or delete SSL certificates.

Step 3 − Scroll down to Upload a New Certificate, paste your SSL/TLS code in textbox and click Save Certificate or Upload a .crt file, which will be provided by hosting provider and Click Upload Certificate.
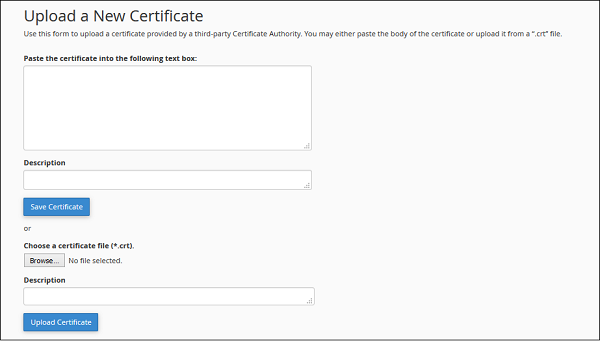
Self–Signed Certificate
You can also use a self–signed certificate on your website too, but when somebody will open your website, it will show an error that the certificate is not form a trusted certificate provider. It is recommended that in production environment, you use a purchased SSL/TLS certificate.
To Generate a Self–signed Certificate, you can follow these steps.
Step 1 − Scroll down to Generate a New Certificate in Certificates section.

Step 2 − Choose an existing Private Key from Key dropdown, you can also choose to generate a new Private Key.
Step 3 − Enter Domains for which you want to generate CSR, you can choose a wild card domain by putting * as a subdomain. E.g. *.tutorialspoint.com.
Step 4 − Provide all necessary information in text fields like City, State, Country, Company etc.
Step 5 − Click Generate to generate a Certificate.
Installing SSL
To activate SSL/TLS certificate in your domain or Subdomains follow these steps −
If you have obtained a SSL/TLS certificate from a Trusted Certificate Provider, to use it on your website, you will need to upload it to your server.
To generate Upload a SSL/TLS certificate, follow these steps below.
Step 1 − Click SSL/TLS link found under Security section of cPanel.
Step 2 − Under Certificates (CRT), click Install and Manage SSL for your site (HTTPS).

Step 3 − In this interface, you can choose to install SSL in your website. Scroll down to install an SSL Website.

Step 4 − Choose a certificate from the installed certificates by clicking on Browse Certificates. At the same time, you can also select a Domain from the dropdown box and Click Autofill by Domain.
Step 5 − All fields of Certificates, Private Key and Certificate Authority bundle will be filled automatically.
Step 6 − Click Install Certificate button to activate the certificate for the Domain or Subdomain.
cPanel - Hotlink Protection
Hotlink Protection prevents other websites to directly load data from your website. For example, when somebody links an Image on your website to load up on his website, when a visitor visits the other website, the image is loaded form your website consuming your bandwidth. Hotlink protection enables prevention against this. If Hotlink Protection is Enabled, other websites will not be able to directly link to any file on your website.
To use this feature, follow these steps −
Step 1 − Open cPanel Hotlink Protection by clicking on Hotlink Protection found under Security section of cPanel home.

Step 2 − Click on Enable button on Hotlink Protection Interface to enable Hotlink Protection.
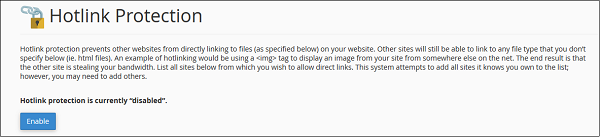
Configure Hotlink Protection
You can configure Hotlink Protection to give access to those URLs, which you want, those URLs can link to your files directly. Additionally, you can provide the extensions of those files, which you want to protect via Hotlink Protection.
To configure Hotlink Protection, scroll down to Configure Hotlink Protection on Hotlink Protection Interface.
URLs to allow access − Enter those URLs here, whom you want to grant permission to directly access your website’s files.
Block direct access for the following extensions (comma–separated) − Enter those file extensions here, which will not be able to be linked by other website. For E.g. MP4, JPG, and PNG etc.
Allow Direct Requests − This will allow the user to access your files directly by providing full URL of your file. For example, when a visitor will enter the full URL of a PDF file, the file can be viewed in a browser. It is recommended that you select this checkbox.
Redirect the request to the following URL − If a website tries to link to a file directly from your website, the system will redirect that URL to the one provided in this field.
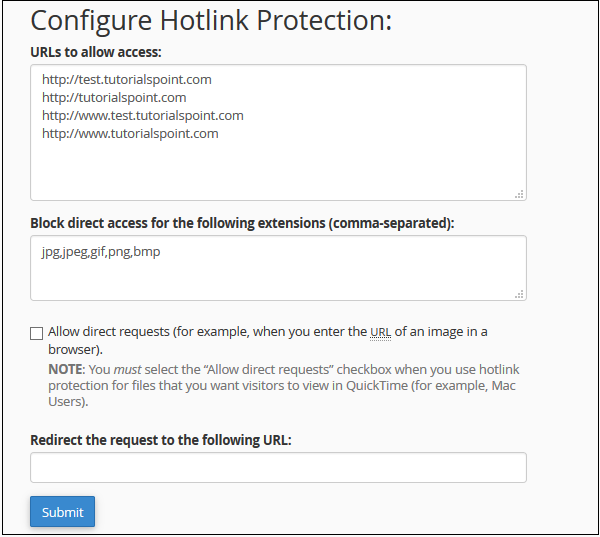
Click Submit to update the changes you made.
cPanel - Ruby on Rails
This interface of cPanel allows you to create and Install a Ruby on Rails application. If you have a Ruby on Rails application developed, you can deploy it to your server using this interface.
To Create a Ruby on Rails Application, follow these steps −
Step 1 − Click Ruby on Rails found under Software Section of cPanel Home.
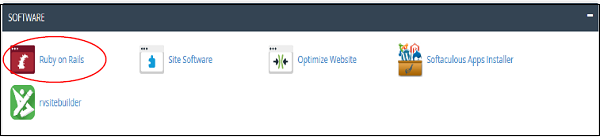
Step 2 − In Ruby on Rails Interface, you will find Create Ruby on Rails Application.
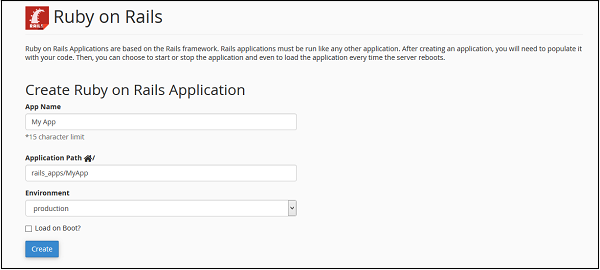
Step 3 − Provide name of your application in App Name.
Step 4 − Provide a Path for your application in your Home Directory.
Step 5 − Choose appropriate environment for your Application. Select Load on Boot, if you want your application to automatically start, whenever your server starts.
Step 6 − Click Create to create a new Ruby on Rails Application.
To delete a Ruby on Rails Application, you can scroll down to the list of currently Available Ruby on Rails Application.

Click Delete link from Action button to delete the application. You can also change the preferences of application from this interface.
Create a Rewrite
Ruby on Rails applications run on a different port rather than the incoming traffic. People will access port number 80 or 443, which is for http and https, and hence you will need to redirect people from that port on to which Ruby on Rails application is running. To create a rewrite, scroll down on Ruby on Rails Interface to Create a Rewrite. Click Create Rewrite link next to the app name of which you wish to create the rewrite.

It will take you to the following interface.

Choose a domain from the dropdown and if you want, you can specify a URL for that too in the URL text box.
Click Save to create a rewrite.
cPanel - Optimize Website
This interface of cPanel helps you to enable gzip compression. Apache allows you to compress the data before sending it to the browser and then web browser extracts the data and displays the webpage. All modern browsers support gzip compression. This gzip compression needs Apache mod_deflate to function currently, which is available in most cPanel installed Linux servers. This compression is very useful, because it helps in compressing data hence our bandwidth is saved, plus it makes our website to load much faster.
You can compress specific types of MIME (Multipurpose Internet Mail Extensions) or you can compress all the files using this interface.
To enable gzip compression, follow these steps −
Step 1 − Open cPanel Optimize Website interface by clicking on Optimize Website link in the Software section of cPanel.
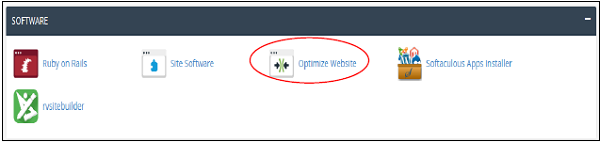
Step 2 − In Optimize Website, you will see Compress Content.
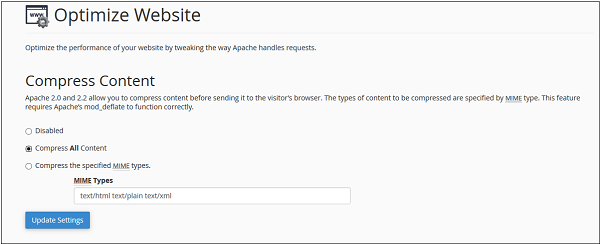
You can choose from the following −
-
Choose Disable to disable gzip compression.
-
Choose Compress All Content to enable gzip compression for all content.
-
Choose Specified MIME types and provide MIME types in text box. MIME type are similar to file types. It has both file type and file format information separated with a slash. E.g. text/javascript, text/css, image/jpg, image/png etc.
Step 3 − Click Update Settings to update the settings.
cPanel - Cron Jobs
If you want to run a command or a php program on a specified time interval like once a day or once a week, you can setup cron jobs in this interface. Cron jobs allow you to run a specific command or program automatically. This is often required, if you are using a software like CRM or Billing Software. Setting up cron jobs more often may degrade your server’s performance.
Setup Cron Job
To add a new cron job, follow these steps −
Step 1 − Open Cron Jobs by clicking Cron Jobs found in the Advanced section in cPanel.

Step 2 − Scroll down to see Add New Cron Job interface.
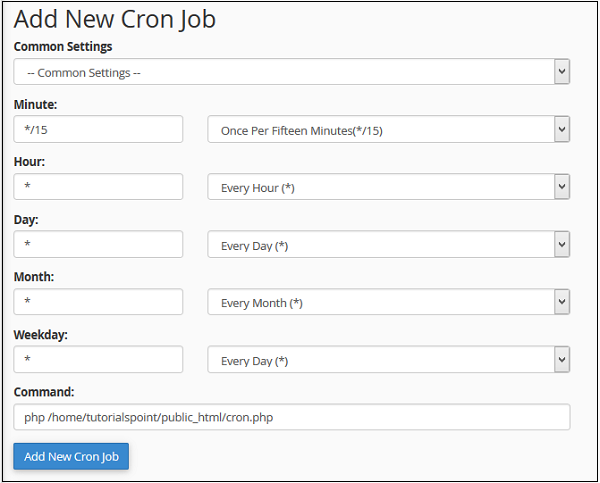
Step 3 − You can choose an existing setting from common settings. If you do that all the fields of cron execution time will automatically get filled. Or you can choose your custom runtime settings by specifying in the next text inputs accordingly.
Step 4 − Enter your command to run in cron job. If you are running a php file, enter full name of php file. For example −
php /home/tutorialspoint/public_html/cron.php
Step 5 − Click Add New Cron Job button to add a cron job.
Cron Email
cPanel by default sends an email each time a cron job runs. It also redirects the output of the command or file into the email. Default email for this is your system account, but you can change this email too. To change the email on which you want to receive cron email, firstly find out Cron Email interface in Cron Jobs. Then enter your new email in which you wish to get cron emails. Click Update email to update your email.
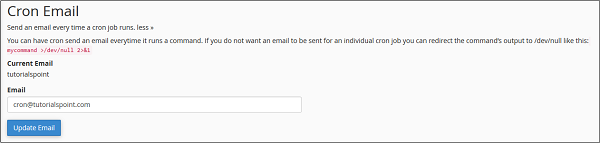
If your cron runs more frequently, then you may not want to receive emails, you can disable receiving emails by redirecting your output into null by writing >/dev/null 2>&1 at the end of the command. For example −
php /home/tutorialspoint/public_html/cron.php >/dev/null 2>&1
Edit or Delete Existing Cron Jobs
To edit or delete your existing cron jobs, you can scroll below on the Corn Jobs interface to see current cron jobs. Once you select the job, you can click either the delete link or the edit link to edit or delete a particular cron job.

cPanel - Track DNS
You can use this interface of cPanel to find out the general DNS of a domain. It will give you the IP address of that domain, mail servers and raw DNS information. This can be useful to retrieve network information.
Domain Lookup
This tool retrieves the IP address of the domain and displays email hosts used by the domain. It also displays the raw DNS data of the domain.
To lookup a domain, use the following steps −
Step 1 − Open cPanel Track DNS by clicking Track DNS link found under the Advanced section of cPanel.

Step 2 − In the Domain lookup interface, enter the domain, which you want to look up.

Step 3 − Press Look Up button to lookup a DNS of a domain.
You will get information in the following manner.
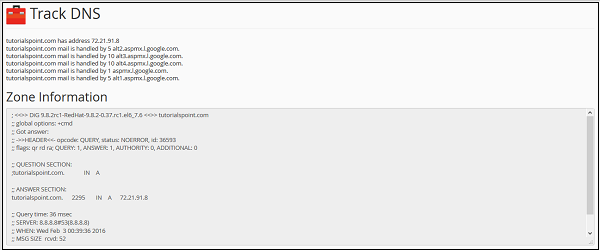
The top-most line provides the IP address of the domain. The other following lines tells about the mail servers. In Zone Information, you will see the raw DNS information of the domain.
Trace Route
Another function in cPanel Track DNS is the trace route. This function of Track DNS gives you information of the route between the computer in which the user is logged in and the server, where your website is hosted.

To trace the route of your computer and the server, scroll down to see Trace Route interface. Click Trace to get the information of the route between your webserver and you.
cPanel - Indexes
You can customize the way a directory looks in your website. By default, cPanel displays the list of files and directories, if there is no index file in that directory. You can choose the way it displays the list of contents in the front-end. You can also choose to disable the indexing of files in that directory by choosing No Indexing.
To manage cPanel Indexes, follow these steps −
Step 1 − Open cPanel Index Manager by clicking on Indexes found under Advanced section of cPanel Home.

Step 2 − You can select a directory of which you wish to manage indexes by clicking over the name of directory. To navigate within directories, you can click on the folder icon corresponding to that directory to open up the directory.

Step 3 − Once you have selected the directory, you will be given some options to choose form.
-
Default System Indexing − Enables the default setting your hosting provider setup for you.
-
No Indexing − This option will disable the directory listing and if there is no index file such as index.php or index.html in the directory. User will get an error.
-
Standard Indexing − This option will enable the directory listing and user will see the name of the directories.
-
Fancy Indexing − This option will enable the directory listing and user will see the name and description of the files and directories under your indexed directory.

Step 4 − Click Save to save your choice for that directory. If successful, you will see a success message.
cPanel - Error Pages
When visitors browse your website and there is some problem accessing your website, your webserver automatically provides a basic error page. A Basic error page shown by apache webserver, when an error is encountered.
A Basic page contains the error code and error message only. You can customize this error page according to your choice. Each problem your webserver encounters has a unique error code; your webserver displays the error accordingly.
To modify an error page, follow these steps −
Step 1 − Open cPanel Error Pages interface by clicking on Error Pages link found in the advanced section of the cPanel Home.

Step 2 − In Error Pages interface, select the domain or subdomain for which you want to configure the error pages from the drop down menu.
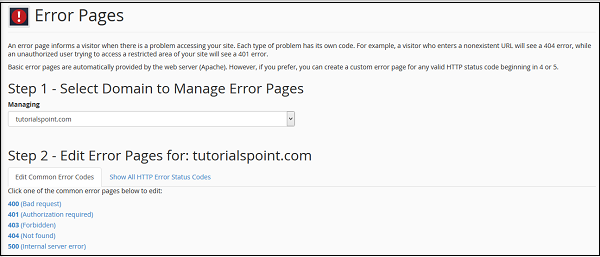
Step 3 − Select the error code of which you wish to edit the error page. You can choose from the Common Error codes or you can click All HTTP error codes to see the list of all error codes.

Step 4 − It will open an HTML editor for you in which you can enter the HTML code for the error page you selected. You can also use predefined tag in your code, click on the tag to insert it to the editor.
Step 5 − When finished inserting the code in the editor, Press Save button to save the error page. Now each time your visitor will encounter the error, he will be served your custom error page.
cPanel - MIME Types
MIME (Multi–Purpose Internet Mail Extensions) types tell the browsers how to handle certain types of files. When a file is sent to a browser of your website’s visitor, it also sends the MIME type of that file with that too. The MIME type tells the browser about the type of file and how the file will be served to the user. For example, if a .js file is sent to the browser then application/JavaScript MIME type is also sent to tell the browser that the .js file is a JavaScript file, and browser handles the file accordingly.
Most of the MIME type are defined in a system defined MIME types. But if you have a file with custom extension, you can specify MIME type for that file in this interface. This will tell the browser about your custom extension and how to handle that file.
To add a custom MIME type, please follow these steps −
Step 1 − Open cPanel MIME Types by clicking on MIME Types in Advanced Section of cPanel.

Step 2 − In Create A MIME Type interface, Enter your MIME type.
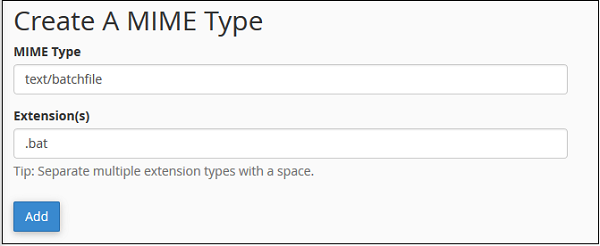
Step 3 − Enter the extension for your file. If you have multiple extensions, you can add all of them at once by separating them with a space.
Step 4 − Click on Add button to save the custom MIME type.
Delete a MIME Type
You can only delete the MIME Types defined by you. As, you are not allowed to delete the MIME types, which are defined by the System automatically. To delete a MIME type, Scroll down to the User Defined MIME Types and Click Delete link corresponding to the MIME type you want to delete.

It will ask for confirmation; click Delete MIME Type to delete a user defined MIME type.
cPanel - Virus Scanner
Many cPanel web hosting comes with this ClamAV virus scanner feature to guard against potential threats on your server. You can run on-demand scan of your files to see if they are infected with any virus or not. ClamAV is an open source powerful antivirus, it uses its extensive database to detect several types of potential threats like viruses, Trojan horses, malwares, malicious scripts etc.
You can scan different sectors of your home directory using the antivirus. To scan your account with a virus scanner, use the following steps.
Step 1 − Open cPanel Virus Scanner by clicking the Virus Scanner link in the Advanced section of the cPanel home.

Step 2 − You can choose the scan type from here.
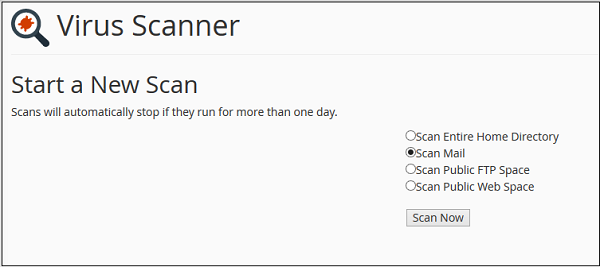
-
Scan Entire Home Directory − This option will scan your entire cPanel account. If you choose this option, no need to run the scan on other options. This will scan your home directory, which contains the Emails, FTP accounts and Website.
-
Scan Mail − This option will scan your emails for viruses. If somebody sends a malicious email having some virus or malware, this virus scanner will tell you that.
-
Scan Public FTP Space − This option will scan your public_ftp folder. If somebody uploaded a malicious file through FTP, virus scanner will find it.
-
Scan Public Web Space − This option will scan your public_html in which all your front end files reside.
Step 3 − Click Scan Now button to start the scan and it will automatically show you the results.
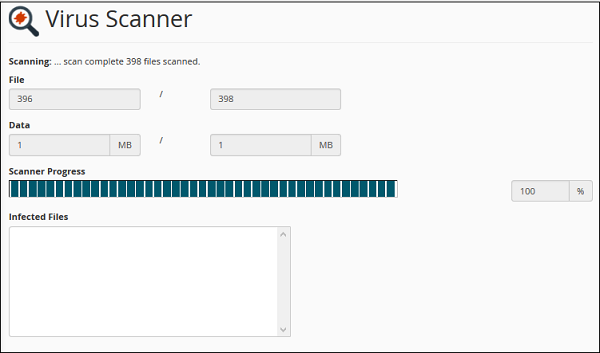
If the Virus Scanner finds any malicious software, then it will give you options to correct the error. You may choose the option accordingly.
cPanel - Softaculous Apps Installer
Softaculous Apps Installer is an auto script installer, which installs the most popular PHP, JavaScript, Perl applications in just a few clicks. When using Softaculous Apps Installer, you will not need to manually install applications by first uploading the files and then creating the database and finally installing them. But you can install them in a few clicks.
To access Softaculous Apps Installer, you can find the Softaculous Apps Installer link in the Software section of the cPanel Home.

You can also find a dedicated section of Softaculous Apps Installer in the cPanel home, which displays the most popular applications and the application category in the front panel.
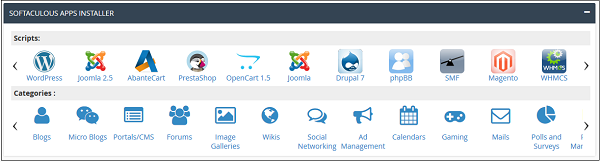
You can install the applications, modify the installation and Create as well as Manage Backups.
When you will click on Softaculous Apps Installer in the Software section, it will take you to the App installer interface like shown below.
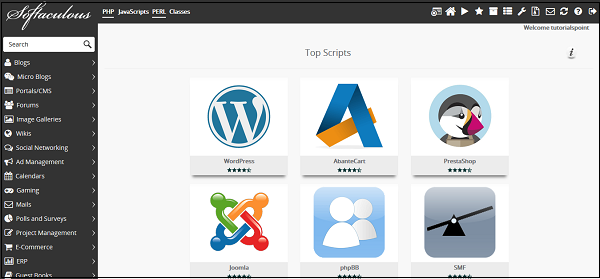
Install Application using Softaculous Apps Installer
To install an application from the Softaculous Apps Installer search from the search box given at left or click on any of the categories. Then you can select the application you wish to install.
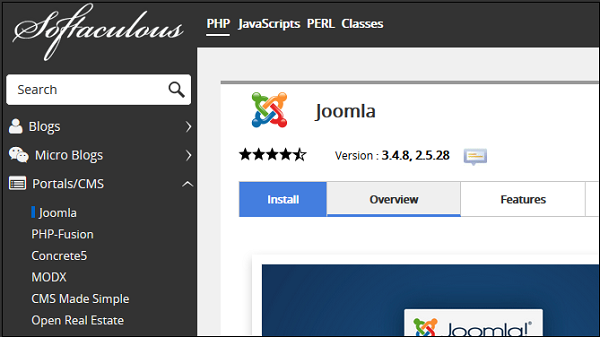
Click Install and follow the instructions that follow to install the application directly into your website.
Create Backup of any Application
You can easily create a backup of your application using the Softaculous Apps Installer to restore it in your account later. To create the backup of your application, you will need to go to the list of all installations section of your Softaculous Apps Installer. Click on the icon at the top of the navigation bar to open All Installations.
In All Installations, you will find the list of all applications, which are installed by the Softaculous Apps Installer.
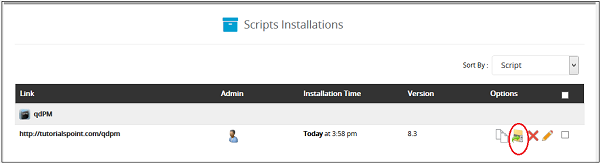
Click on the Backup icon to create an automatic backup of the whole application installation. This backup will include all the files, database and configuration of the application. You can always restore the application by going into Backup and Restore interface of Softaculous Apps Installer, which can be opened by clicking on Backup and Restore icon from the top navigation menu.

cPanel - Installing WordPress
You can directly install WordPress in your website by making a few clicks through the Softaculous Apps Installer. WordPress is a very popular content management software as more than a million websites are powered by it. It’s secure, reliable, easy to use and totally customizable. To install WordPress using Softaculous Apps Installer, follow these steps.
Step 1 − In the left menu click Blogs and you will find WordPress. Click on that and follow the instructions.
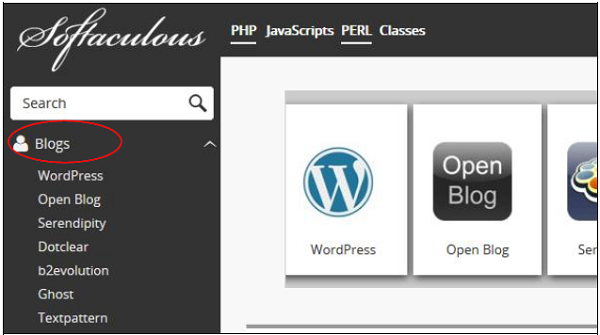
Step 2 − It will take you to the WordPress overview. Click Install and it will take you to the installer interface.
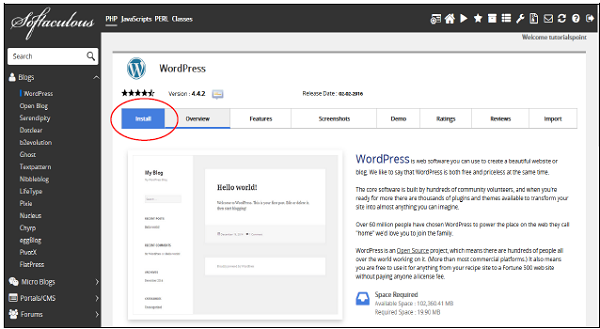
Step 3 − You will be asked for some configuration, which are explained below.
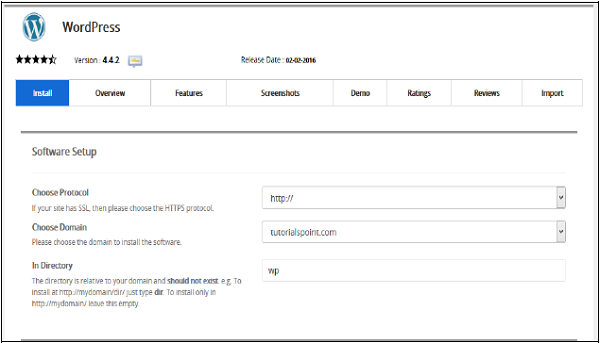
-
Choose Protocol − Choose protocol of your WordPress website. You can use http or https with or without www. If you choose https, then a SSL certificate must be installed in your website. You can change this setting later in WordPress setting, if required.
-
Choose Domain − You can install your WordPress in the root domain or any subdomain you created, choose from the dropdown menu.
-
In Directory − Choose the folder in which you wish to install the WordPress. If you want to install in your root website, make this field empty.
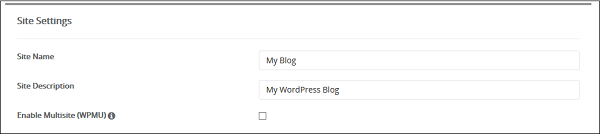
-
Site Name − Give a name to your website in this field.
-
Site Description − Provide a short description of your website.
-
Enable Multisite − If Checked, then it will install a WordPress network installation.
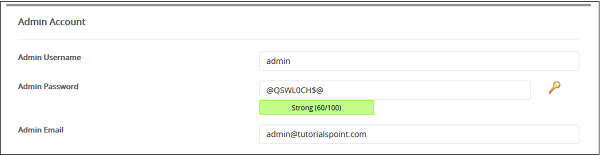
-
Admin Username/Password − Enter your administrator username and password, you will need these to login to your admin panel later.
-
Admin Ema − Enter the email address on which you want to receive the important notification of your WordPress.


Plugins − You can select to install these 3rd Party Plugins, this is optional.

-
Database Name − You can specify a custom database name for your WordPress database, or you can leave this setting as it is.
-
Table Prefix − If you are going to use the same database for more than one installation, you can specify table prefix here. All the tables that will be created will have this prefix before them.
-
Disable Update Notifications − You can choose not to receive update notification on your admin email by selecting this checkbox.
-
Upgrade Options − You can choose to auto upgrade your WordPress CMS, Installed theme or Installed plugins. Select appropriate options.
-
Automated backups − You can choose to create a backup of your WordPress automatically using Softaculous Apps Installer, if selected you can choose a backup rotation for your system.
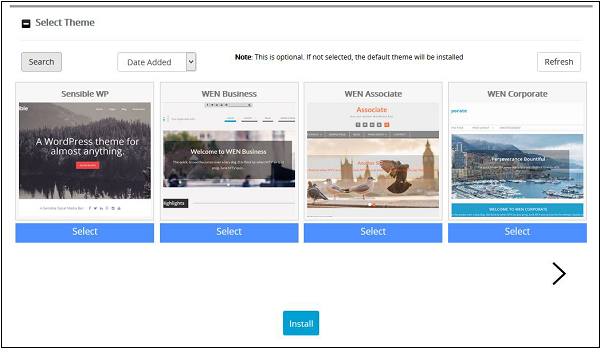
Step 4 − Click Install to install the WordPress CMS on your website. If successful, you will be given the links to your installation and admin panel.
cPanel - FileZilla FTP Client
FileZilla is an open source FTP client, it is available on multiple platforms like Linux and Windows. This client also supports FTP over secured connections that is SFTP and FTPS. You can use this software to upload and manage your files in your webserver. When you wish to upload your website and number of files are more or size of files are very large. Then you can use FTP upload, because uploading a file of very large size through cPanel File Manager can cause an error in uploading.
Most of the cPanel accounts comes with a system FTP account, through which you can access and manage all the files in your home directory. Passwords of system account for cPanel and FTP are same in most cases.
To use FileZilla FTP client, to manage and upload the website, please follow these steps −
Step 1 − Download and install FileZilla FTP client from FileZilla website. The installation process of this software is the same as other software’s.
https://filezilla–project.org/download.php
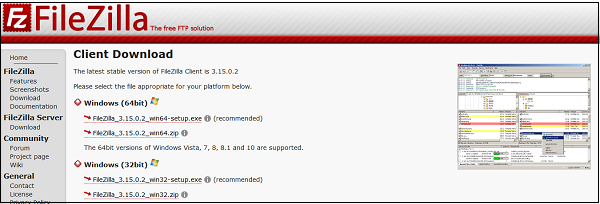
Step 2 − After installing open your FileZilla FTP client. In the quick connect bar, you will find text box to provide hostname. Enter your ftp hostname, which can be IP address of your server or ftp..
Step 3 − Enter the username and password for your ftp account.
Step 4 − Enter Port on which you want to connect to your FTP server. In most of the cases, it is 21, but if you leave this field empty then FileZilla will automatically find the appropriate port to connect.

Step 5 − Click Quickconnect to connect to the FTP server.
Step 6 − After a successful connection, you can move or copy files from the left hand side pane (which are your local computer directories) to the Right hand pane (which are your remote server directories and files). You can drag and drop files from the left to right pane or vice versa.
Step 7 − You can view the status of your moving or copying in the pane, which is on the lower side of the interface.
cPanel - CloudFlare
CloudFlare is a CDN (Content Delivery Network) with both free and paid plans. Most cPanel hosting comes with cPanel CloudFlare plugin, which helps you to quickly signup for CloudFlare and use their CDN. Using CloudFlare has many advantages like it distributes the content over the Internet making our website load faster. It protects the website from SQL injection and DDOS and encrypts the website using SSL.
To use CloudFlare CDN, please follow these steps −
Step 1 − Open CloudFlare interface by clicking CloudFlare found in the cPanel Home under CloudFlare – Supercharge your website section.

Step 2 − In CloudFlare Interface under Sign Up / Log In, Enter your email address and click Signup Now. If you have an existing account with CloudFlare, it will ask you to login, otherwise it will sign you up.
Step 3 − Once you are logged in, you can see the status of your domain in overview section of CloudFlare interface. You will need to change your current Nameservers to those provided by CloudFlare to use it with your website. If you do not like services of CloudFlare, then you can change your domain’s Nameservers back to default.

Step 4 − Once you have updated your Nameservers, you can use CloudFlare CDN. You can also view and configure your website for CloudFlare on their website.

 Radware (NASDAQ: RDWR), a global supplier of cybersecurity and application delivery solutions, has signed a multimillion-dollar deal with a Tier-1 U.S. carrier.